

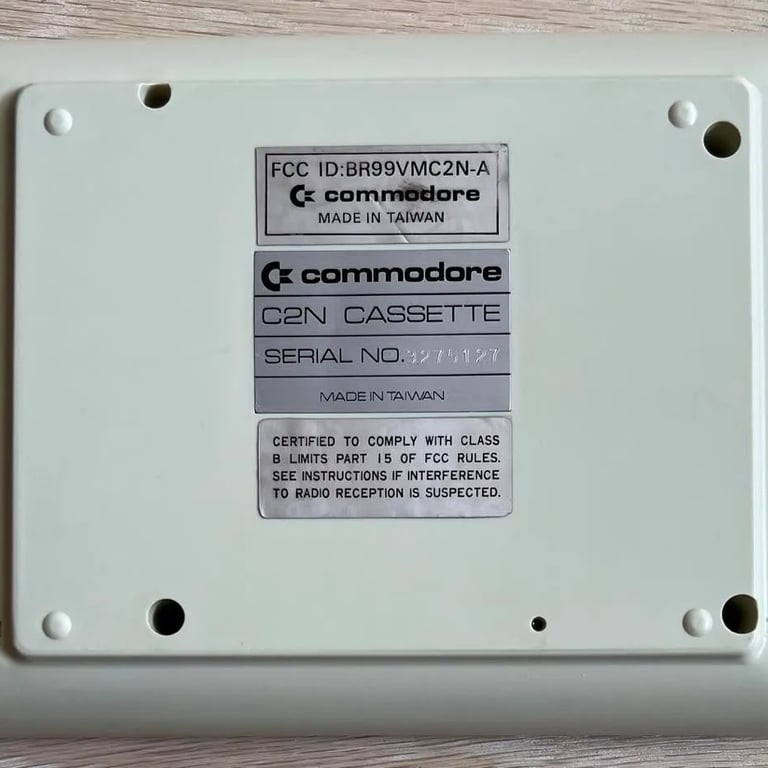
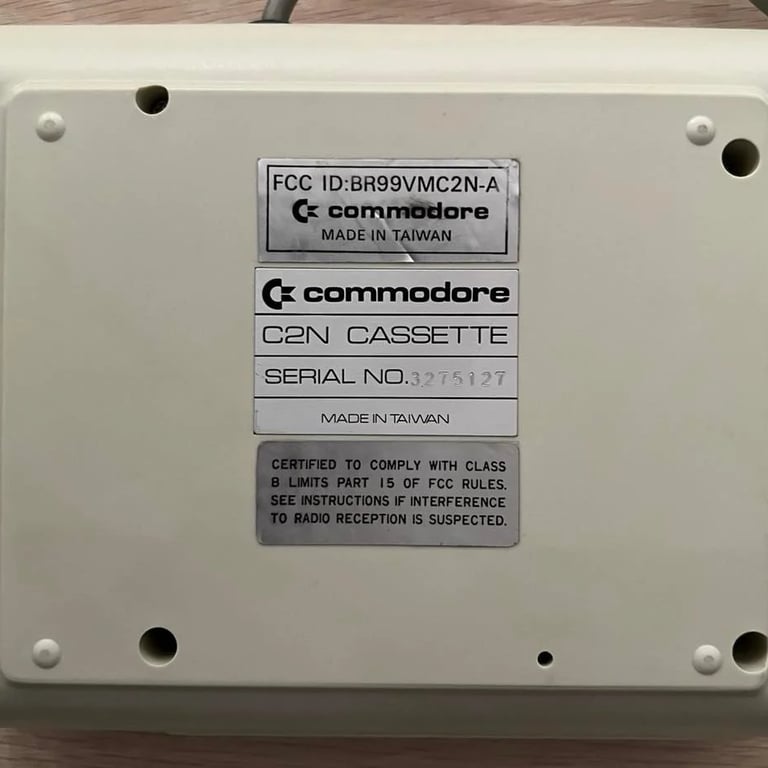
1530 (C2N)
Ser. No. 3275127
Refurbishment plan
To refurbish this datasette the plan is to do this trough the following steps:
- Clean and remove stains from chassis
- Clean the interior mechanics
- Replace motor- and counter belts
- Check PCB for corrosion and replace old electrolytic capacitors
- Adjust head for optimal tape reading
- Verify datasette operation by testing
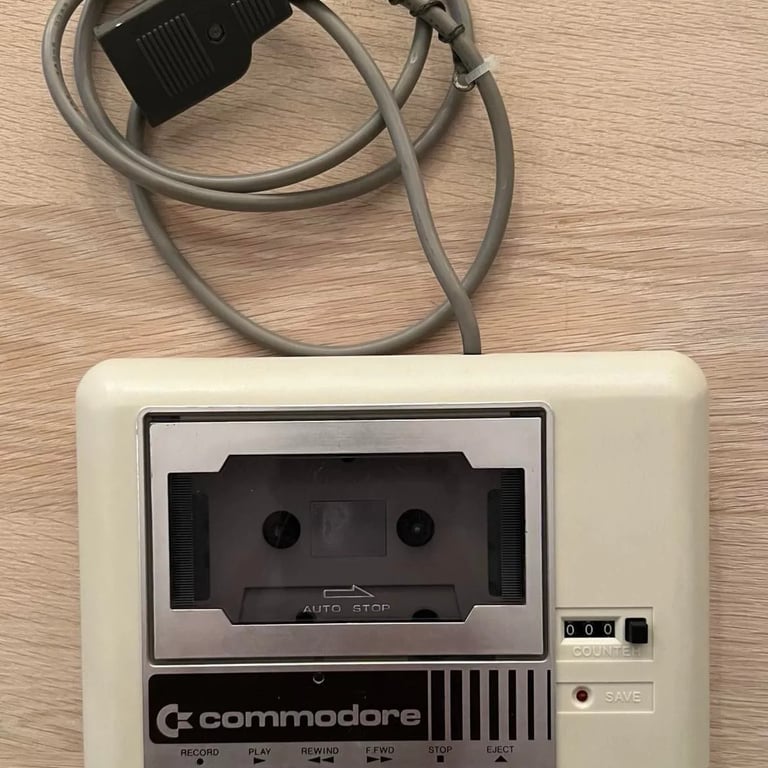
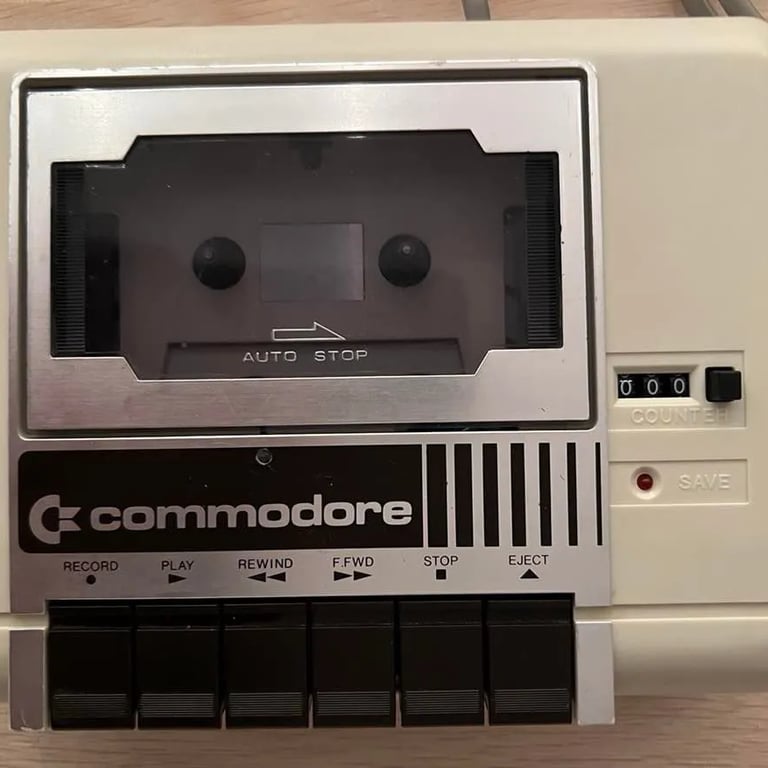
Chassis
The top- and bottom cover of the datasette are disassembled by removing the four screws at the bottom of the chassis. All stickers at the bottom are removed by blowing heat from a hair dryer while and gently removing the stickers with a sharp knife. The reason for removing the stickers is to avoid that they are destroyed/deteriorated in the cleaning process.
The tape lid is also disassembled from the top cover - there is a screw in the top left cover (seen from the back) holding the lid in place. After removing the screw the lid is lifted from the top cover by gently pushing the two pins/brackets towards the middle. See image below for the position of these.

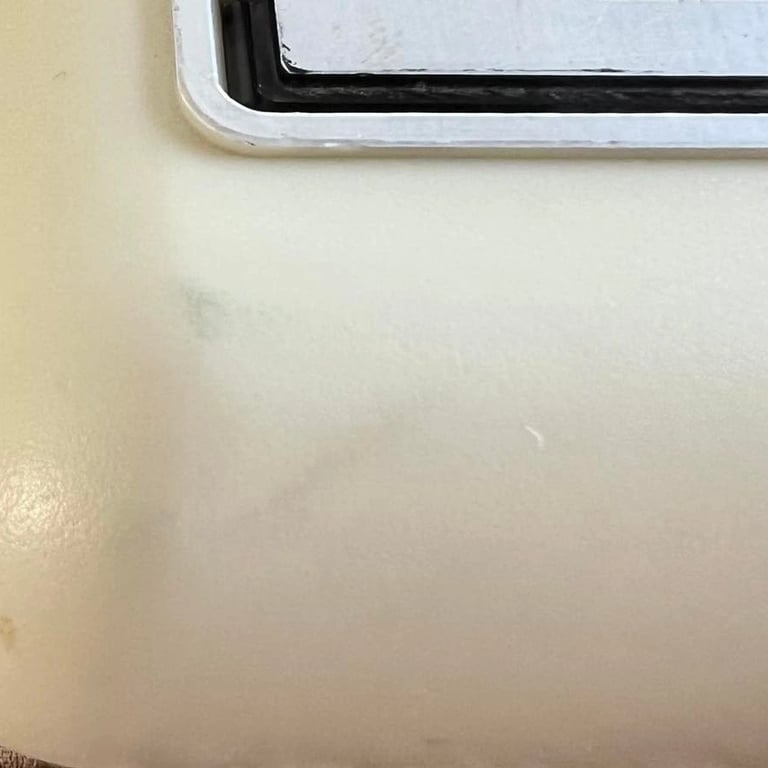
The chassis and the lid is first cleaned with some luke warm water and mild dishwasher soap. This will reveal the more tough stains on the chassis that will be removed by using isopropanol, glass cleaner and baking soda. Baking soda with a Q-tip is a very good way to remove tough stains, but it takes quite some time... Below you will find a sample where some stains were removed with baking soda on this datasette.

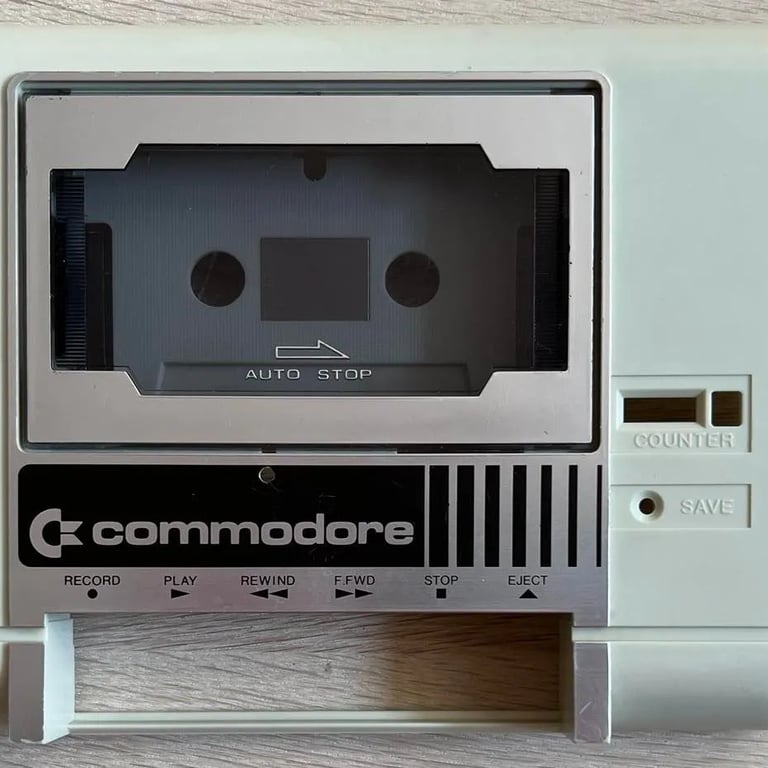
After cleaning is complete, and all noticeable stains are removed the stickers are put back (by using a thin double sided tape). Please click on the images below to see the result in full size. I´m quite satisfied with the result!
Interior mechanics
Interior mechanics are cleaned using a combination of compressed air, isopropanol and luke warm dishwashing soap. Starting with compressed air all excessive dust is removed. After almost 40 years there could be a tremendous amount of dust gathered in the interior mechanics of the datasette. Isopropanol and a Q-tip are used to remove stains from all metal and hard plastic parts.
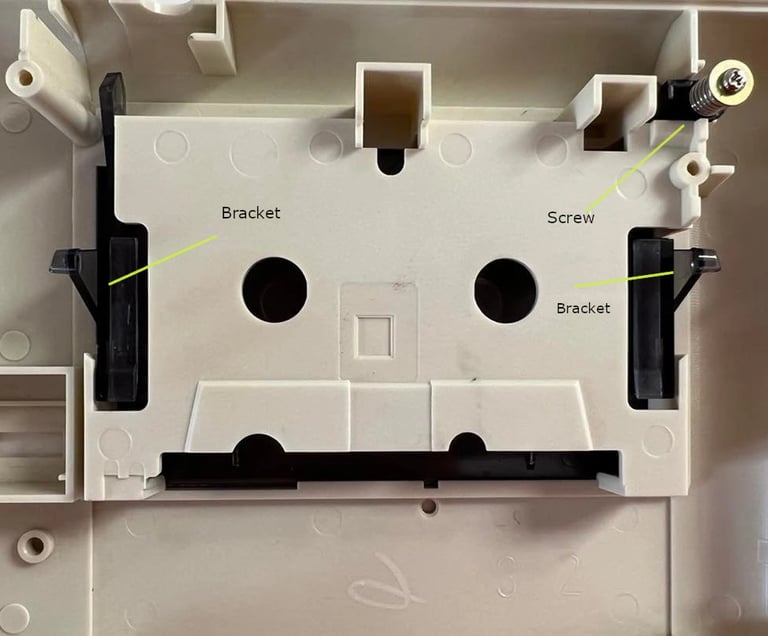
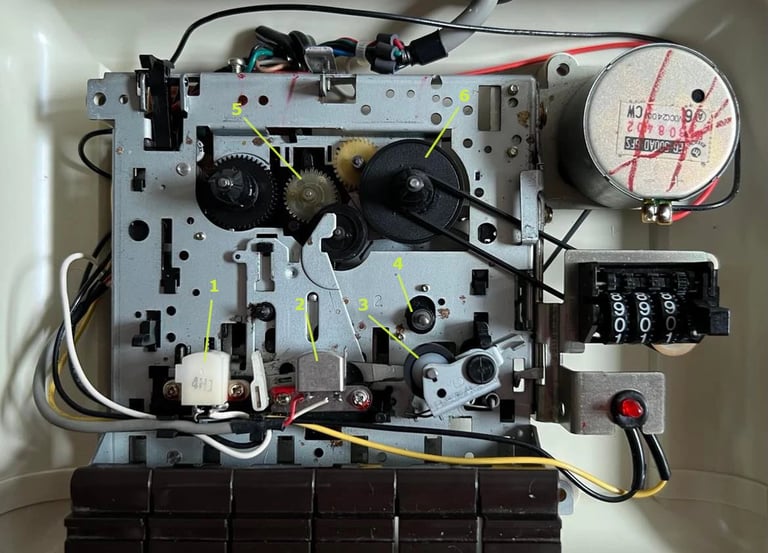
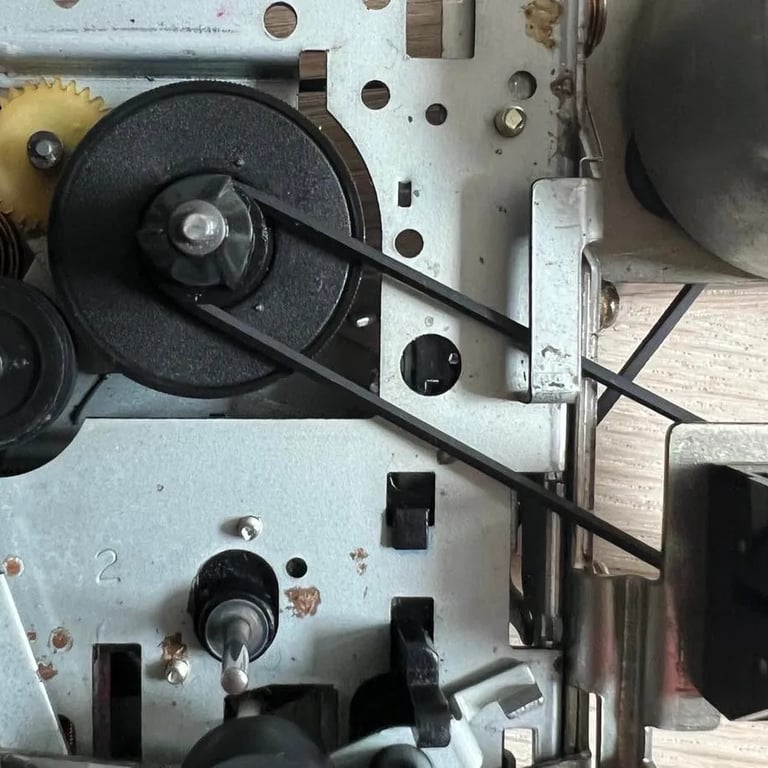
When cleaning the interior mechanics there are four areas that needs special attention. (See image below where these are located in the datasette):
- Erase head (1)
- Record/read head (2)
- Pinch roller and capstan (3 and 4)
- Gears and belt wheels (5 and 6)
The erase- and record/read heads are carefully cleaned with isopropanol and a Q-tip. The capstan is cleaned with isopropanol and the pinch roller is cleaned with a combination of isopropanol, luke warm soapy water and gentle sanding. Note:
- the pinch roller is actually sanded - but this is very lightly only to "refresh" the rubber
- the usage of isopropanol on the pinch roller is limited to prevent damaging the rubber
To clean the gears and the belt wheel I connect the datasette to the Commodore 64, and then press FF/REW to make the gears and wheels spin. This makes it much easier to get a good clean. Warning: be very careful when doing this so that the Q-tip doesn´t get jammed into the gears! Cleaning the pinch roller and capstan is also quite effective when the datasette is powered on - pressing PLAY will engage the pinch roller.
The flywheel on the backside which holds the motor belt is also cleaned using isopropanol.
A close look at the erase head, read/write head, capstan and the pinch roller after the cleanup:

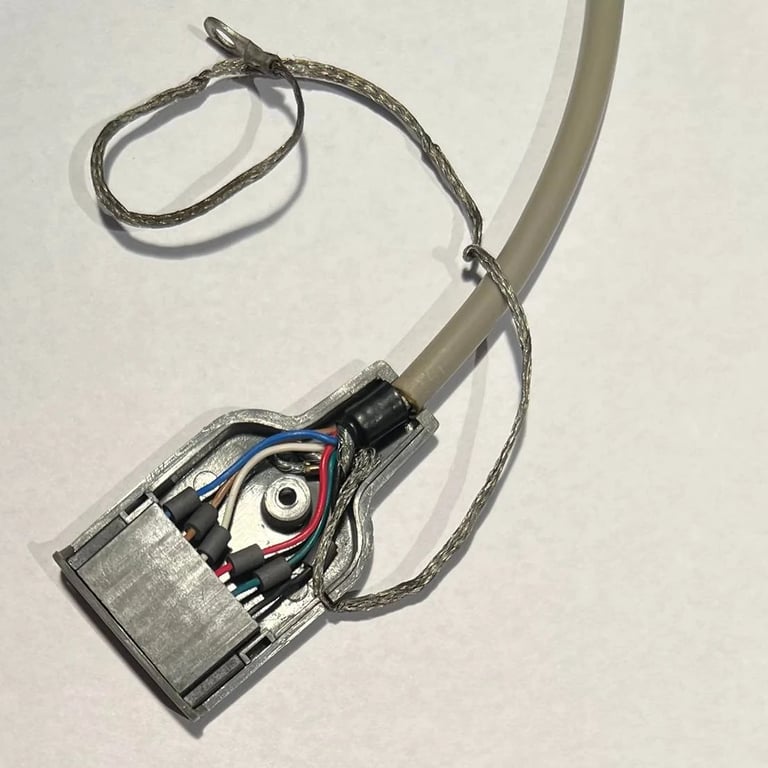
Also, the cable and connector is cleaned and checked. The cable is cleaned with isopropanol, and the metal pins in the connecter is cleaned with contact cleaner. In addition, the ground wire is wrapped around the cable and fastened with a cable tie - you do NOT want this wire to get into the user port by accident...

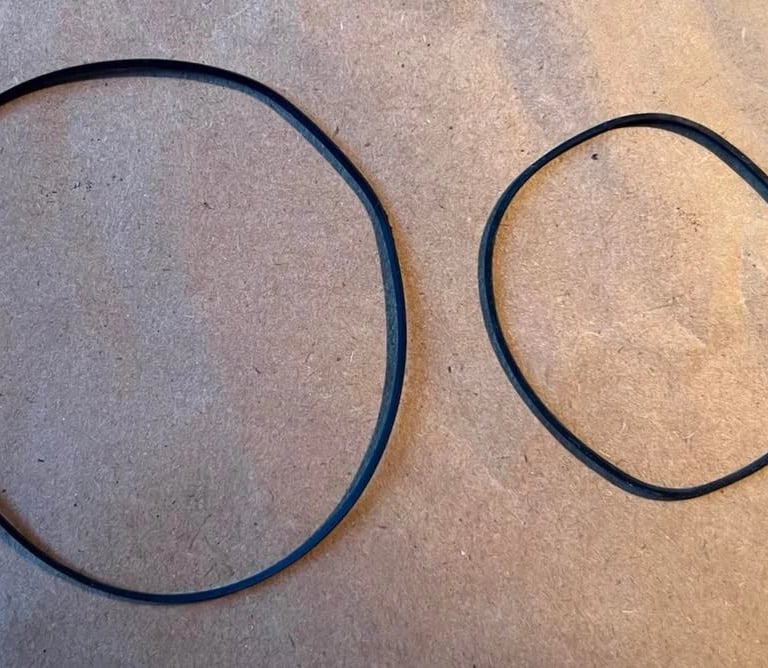
Motor- and counter belts
There are two belts in the datasette; from the motor to the flywheel and from the gears/flywheel to the counter. The latter is not crucial to replace, but it´s essential that the former is replaced. The belts are almost 40 years old and worn out. Using old belts will quite often result in loading from tape failing...
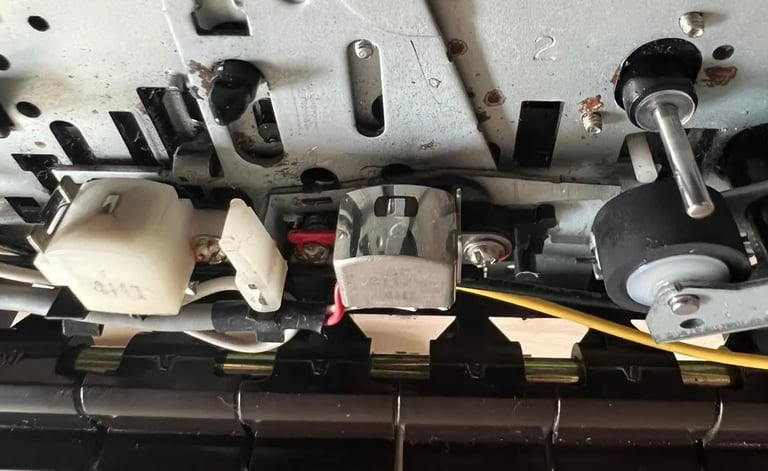
To replace the motor belt the bracket holding the flywheel in place needs to be removed. This is done by removing the two screws holding the bracket in place. In the image below you see the new belt in place, and also the location of the two screws.

The belt for the counter is also replaced, and the two old belts are thrown away... Pictures below (click to enlarge).
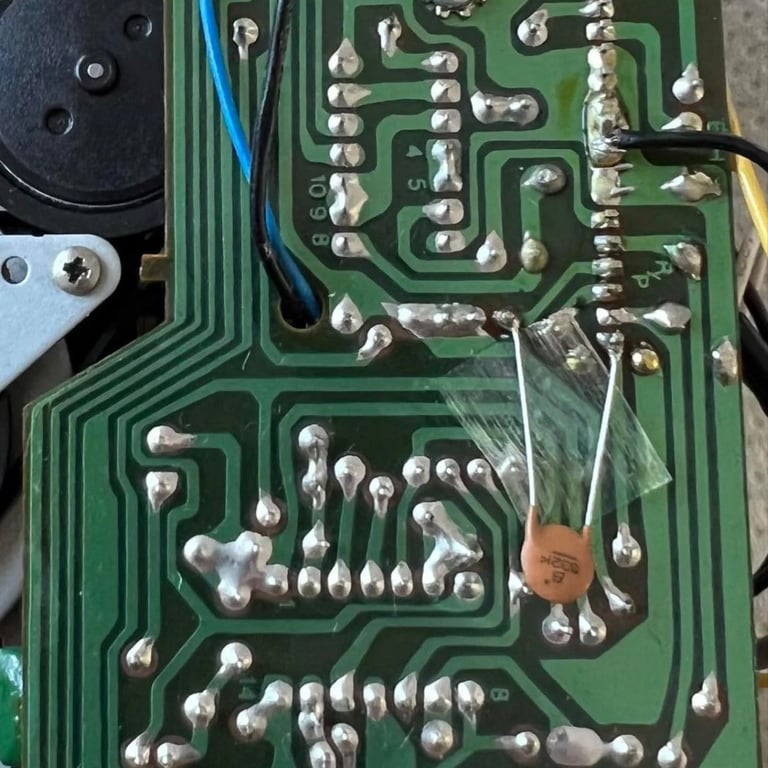
PCB cleaning and re-cap
PCB is disassembled from the interior brackets, and cleaned with isopropanol. There are only two 47uF 10V eletrolytic capacitors on this board. I replace these with new 47uF 16V capacitors from Wurth Electronics. Note that it does not matter if the capacitors are rated with at higher voltage - as long as it's higher it's ok, but it's not wise to use a lower voltage rating.

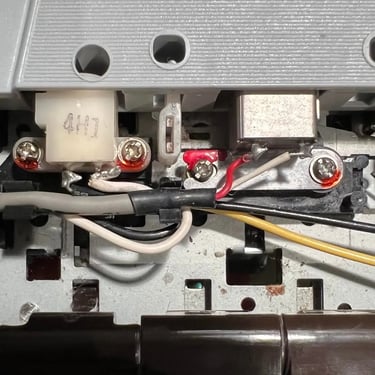
After the cleaning and recap I connect the datasette to my C64 to make sure it still works. But then something strange happens: when pushing REW / FF the motor stops after a few seconds. When I lift the datasette the motor starts again? What?! Then I notice that it might be the small switch (see the yellow circle in the first picture above) that is not properly installed or cleaned. So I disassemble the PCB, re-attach the little switch and clean it with contact cleaner. After assembling the PCB back the problem disappear. But I'm not 100 % I fixed the problem - but this will be checked during testing.
Read/write head alignment
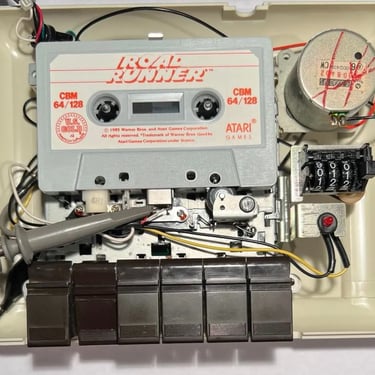
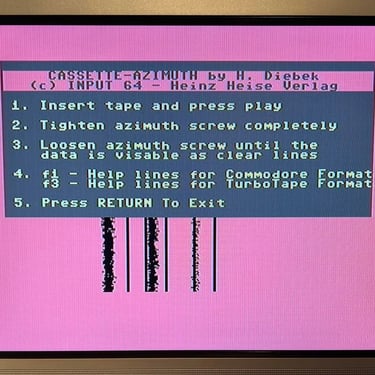
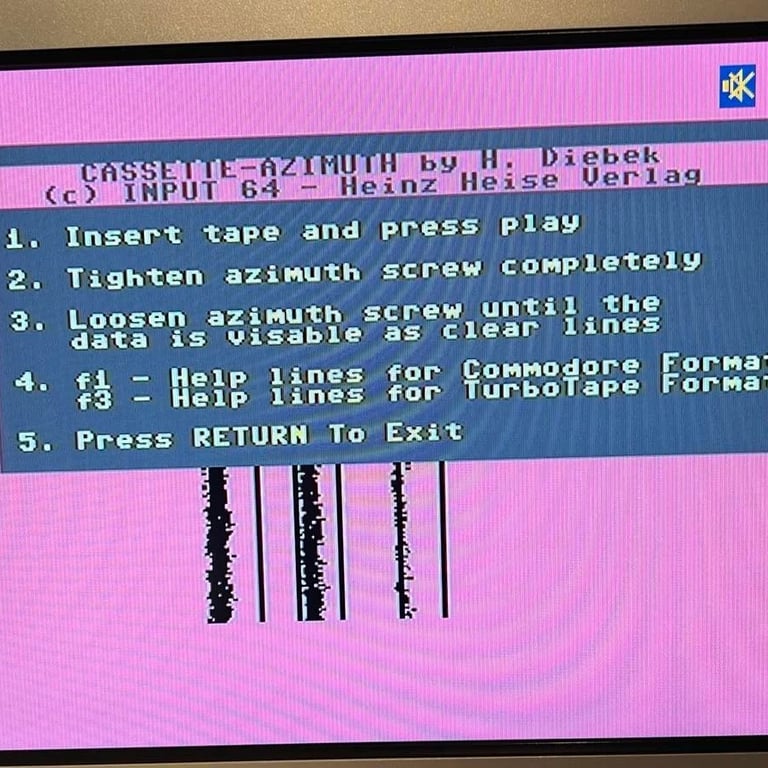
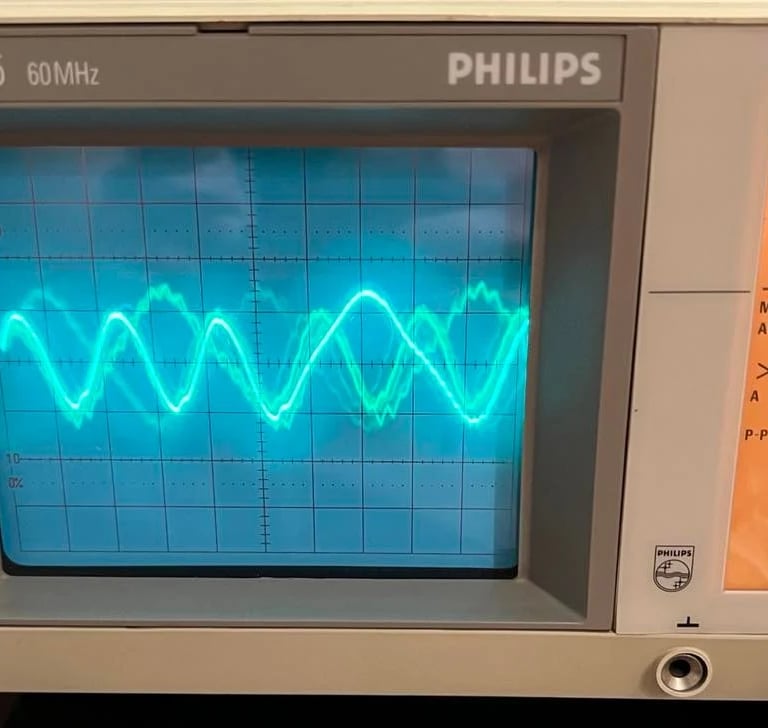
It´s crucial that the read/write head is aligned for optimal performance. Otherwise the datasette will probably not be able to read some old original tapes. The reason for this is that since the tapes are a magnetic media these will deteriorate trough the years - with the result of lower audio level during playback. With a properly aligned read/write head you will increase the probability of a successful playback even with marginal old tapes.Before the read/write head is adjusted the current alignment is checked to be used as a reference. This is done by using an oscilloscope connected to the read/write head and a software tool on the Commodore 64. An original tape (Road Runner) is used as reference tape. See pictures below (click to enlarge).Note: this first check is done before the electrolytic capacitors are replaced.
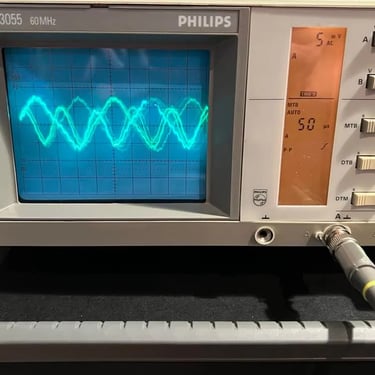
This first check is very promising:
- Amplitude level measured with oscilloscope: approximately 7.5 mV
- Azimuth software showing three clear and distinct lines
- The paint/glue used to lock the read/write looks unbroken. There is a possibility that this is something done by a former owner, but i doubt it... I think this is the paint/glue set by factory which means that the head was aligned when manufactured.
As of now I don´t see any reason to adjust the read/write head, but I will conclude on this when the capacitors are replaced and a new check is done.
The second check is as good as the first check. The new capacitors didn't have any major impact, but that is ok - new caps are still better for long time duration. See pictures below for details.
- Amplitude level measured with oscilloscope: approximately 7.5 mV
- Azimuth software showing three clear and distinct lines
Testing
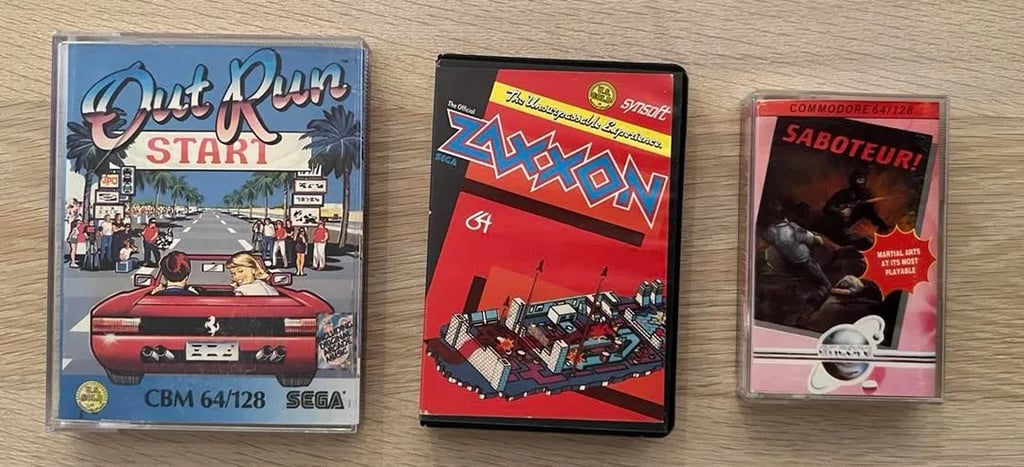
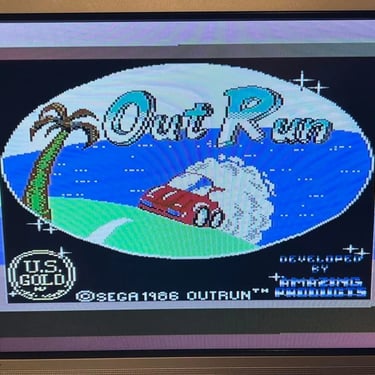
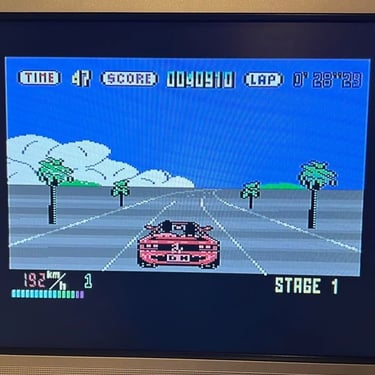
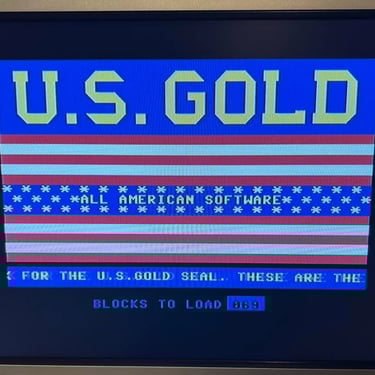
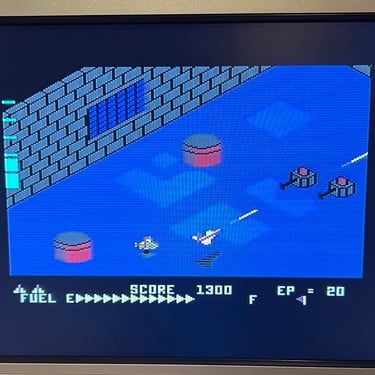
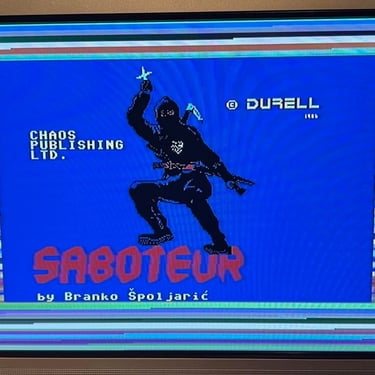
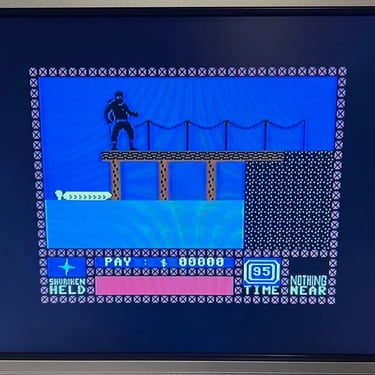
This is my favorite part! After checking that the datasette works fine with the oscillocope and the azimuth test software the final testing is: playing some games with real old original cassettes! Love it! I select three games for testing in addition to Road Runner which I've used for the other tests with this datasette:

Everything works fine - each tape loads without any problem. Also, I've tried all I can to provoke the motor from stopping when using REW/FF but I can't reproduce it. So I conclude that the re-attachment of the switch was successful.
Some pictures from the testing below (click to enlarge).
Final result
"A picture worth a thousand words"
Below is a collection of the final result from the refurbishment of this datasette.
Hope you like it! Click to enlarge!
Banner picture credits: Evan-Amos