

1530 (C2N)
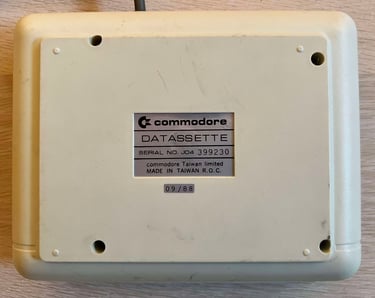
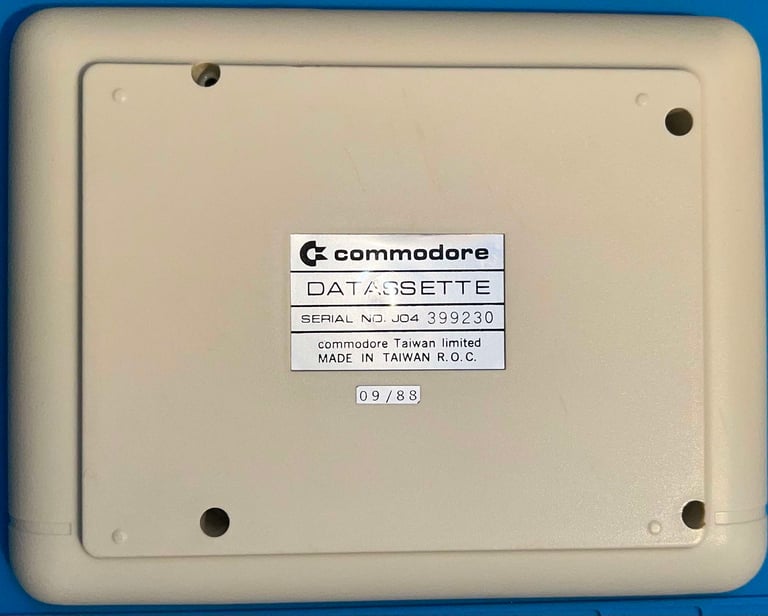
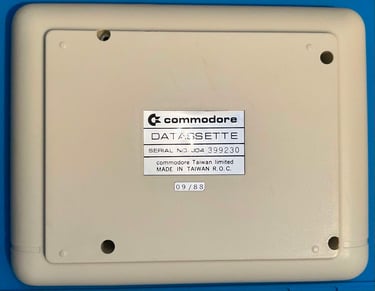
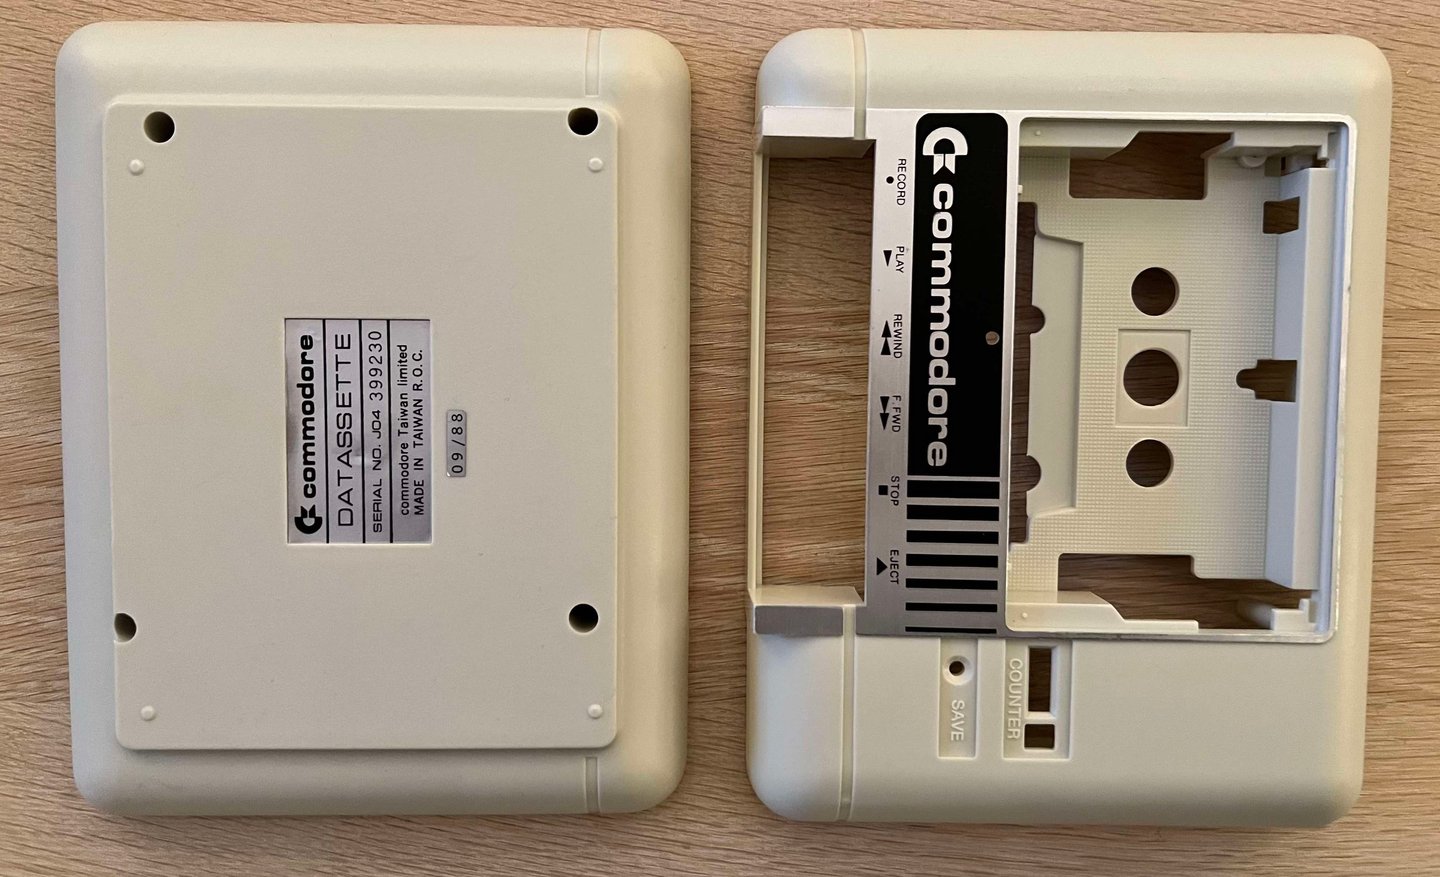
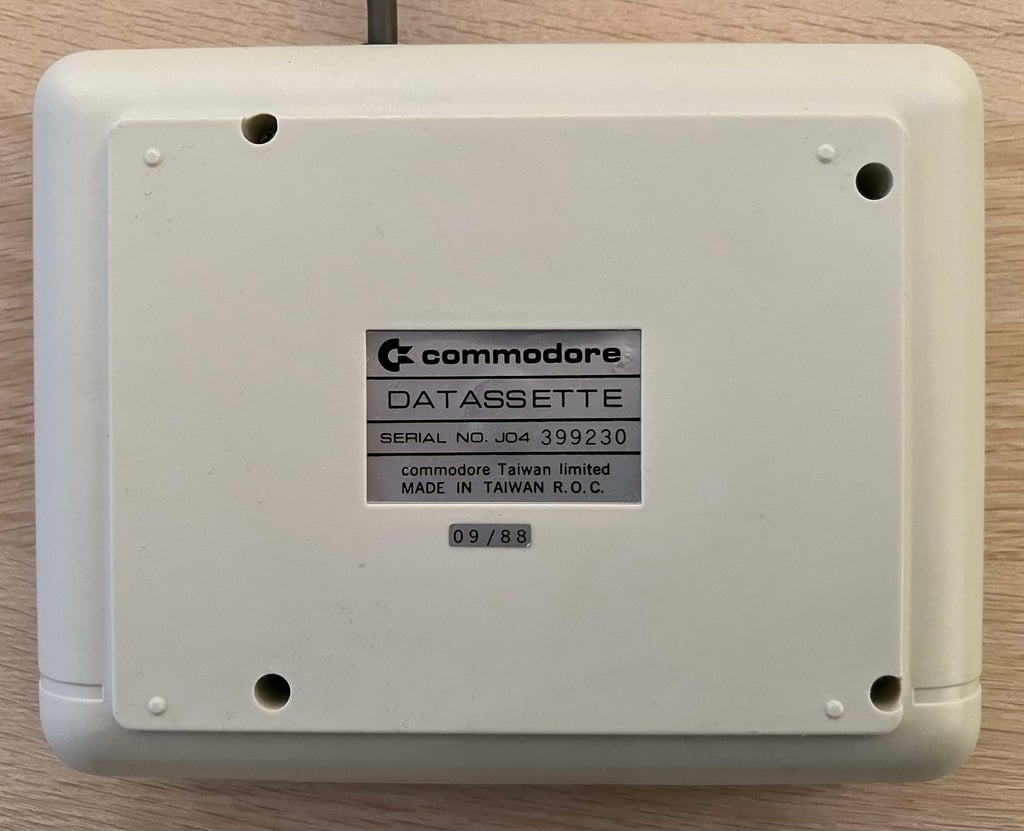
Ser. No. 399230
Starting point
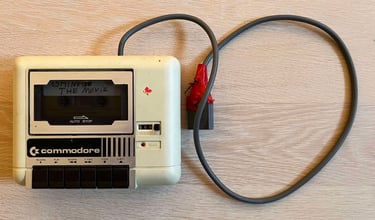
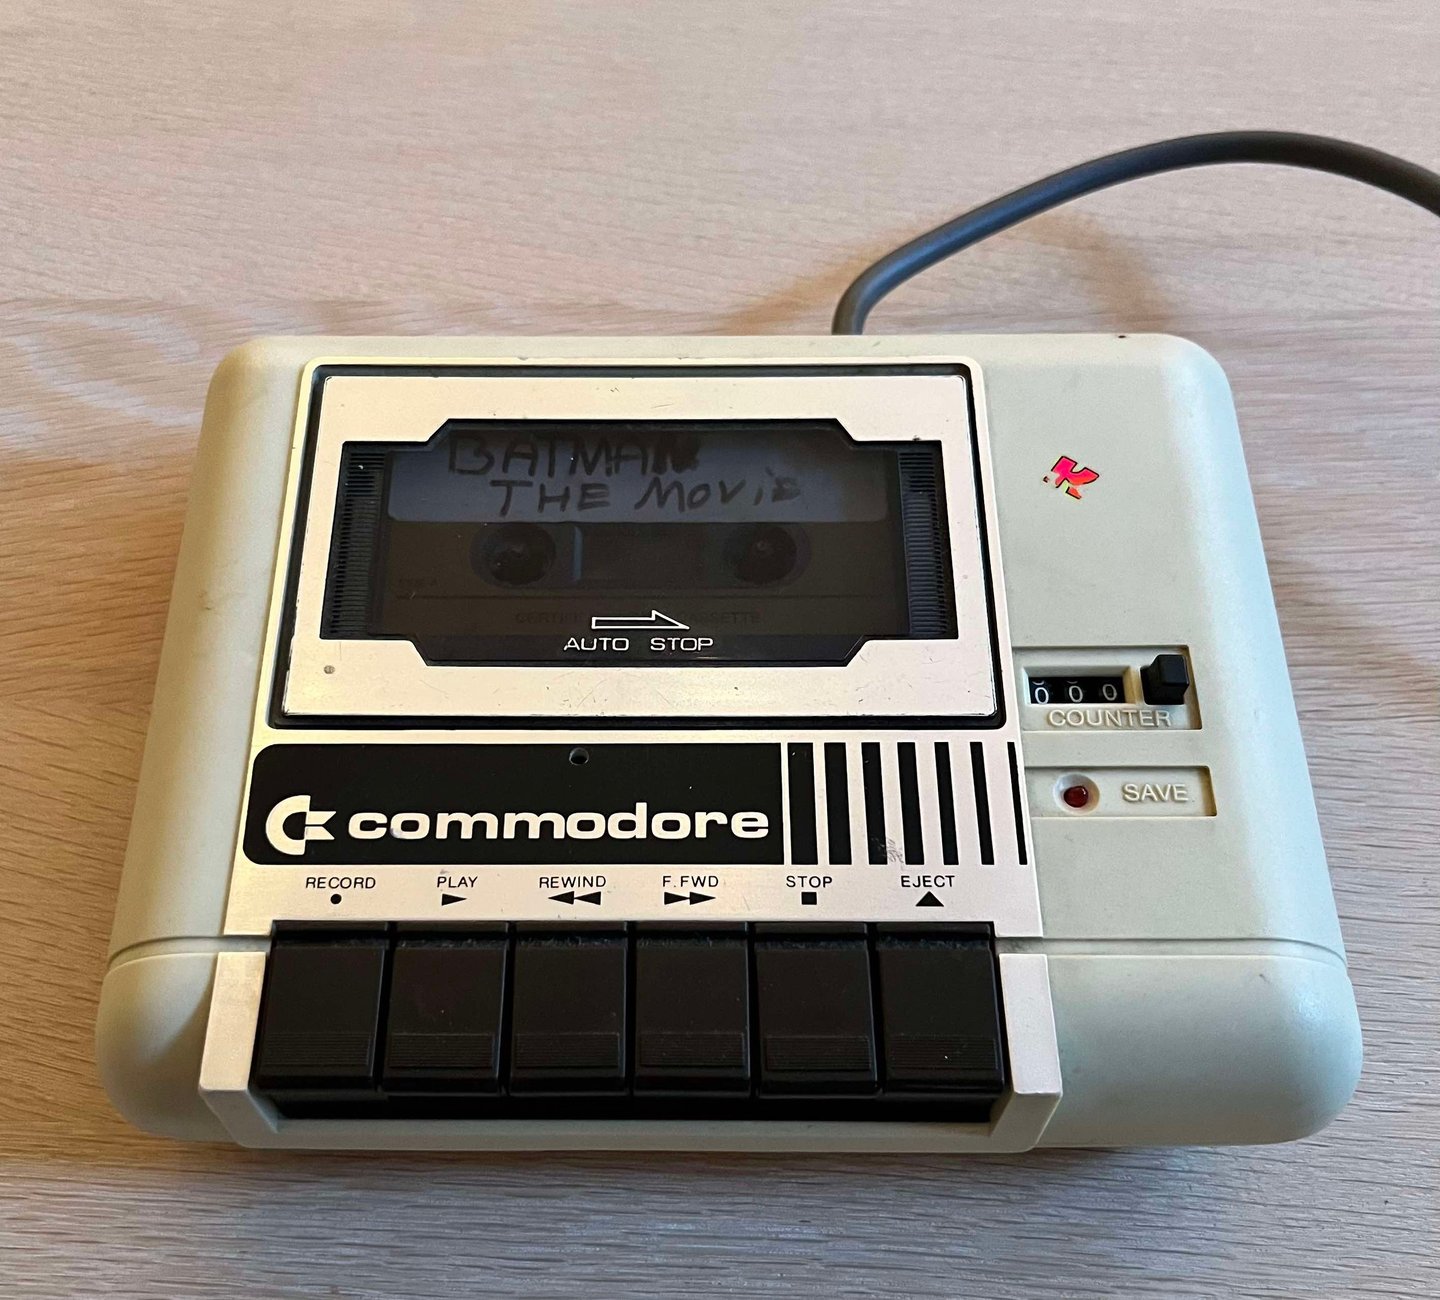
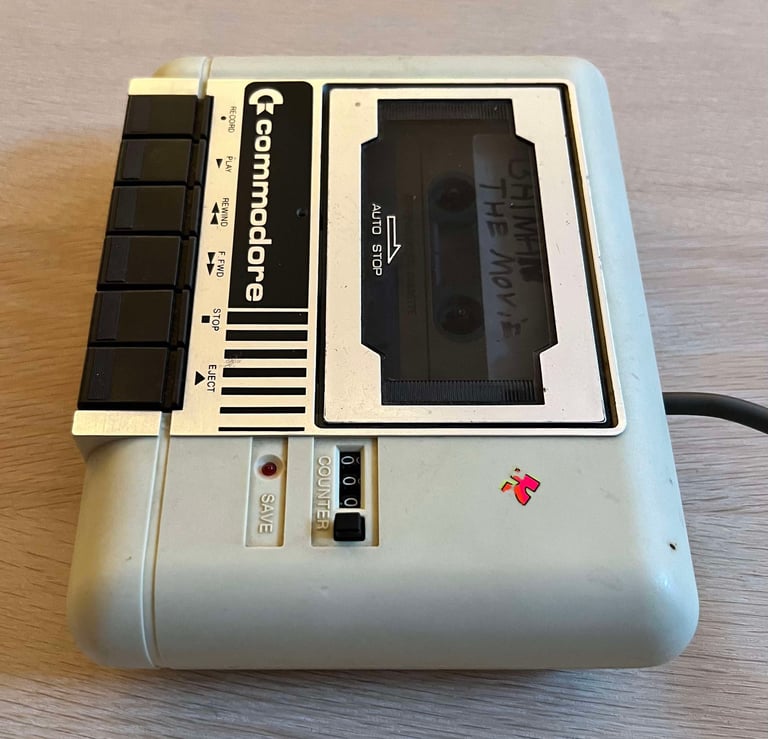
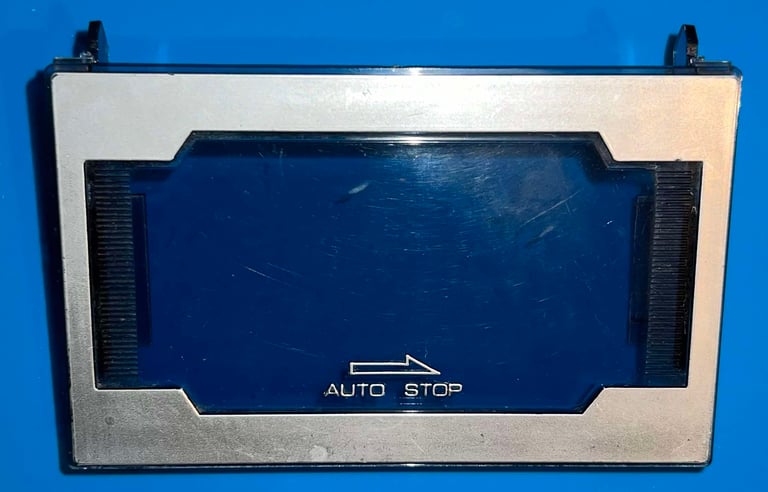
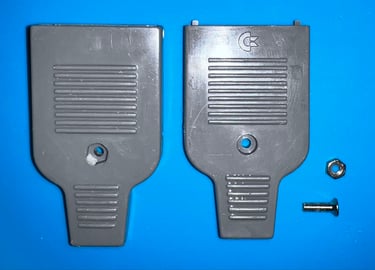
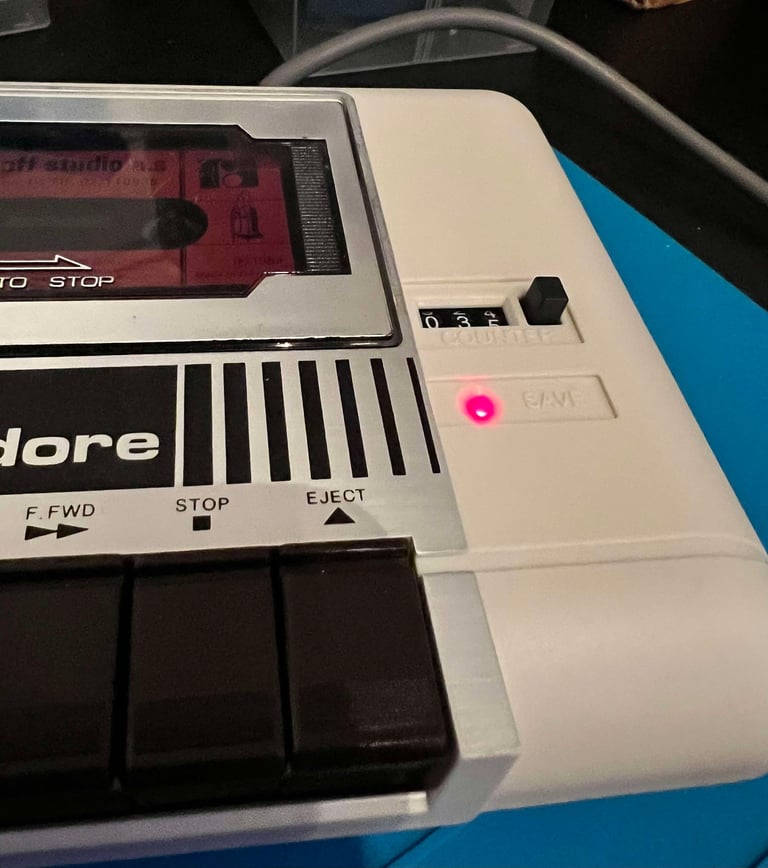
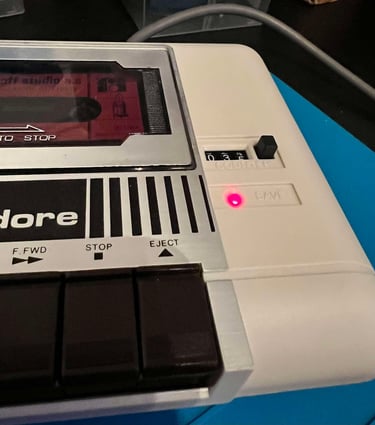
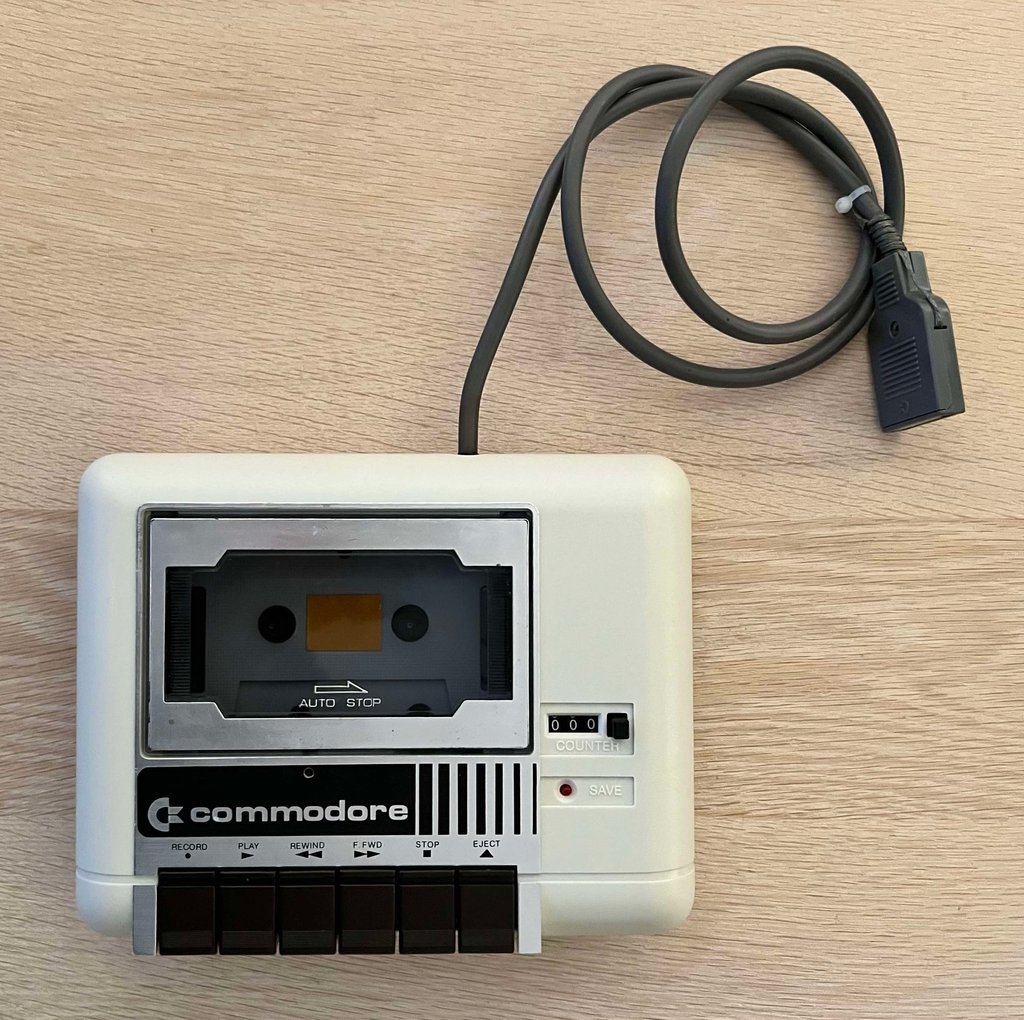
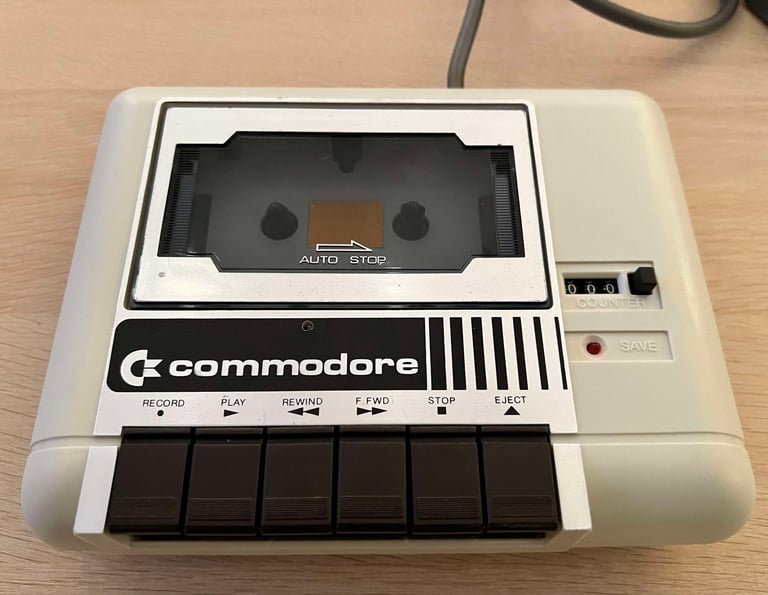
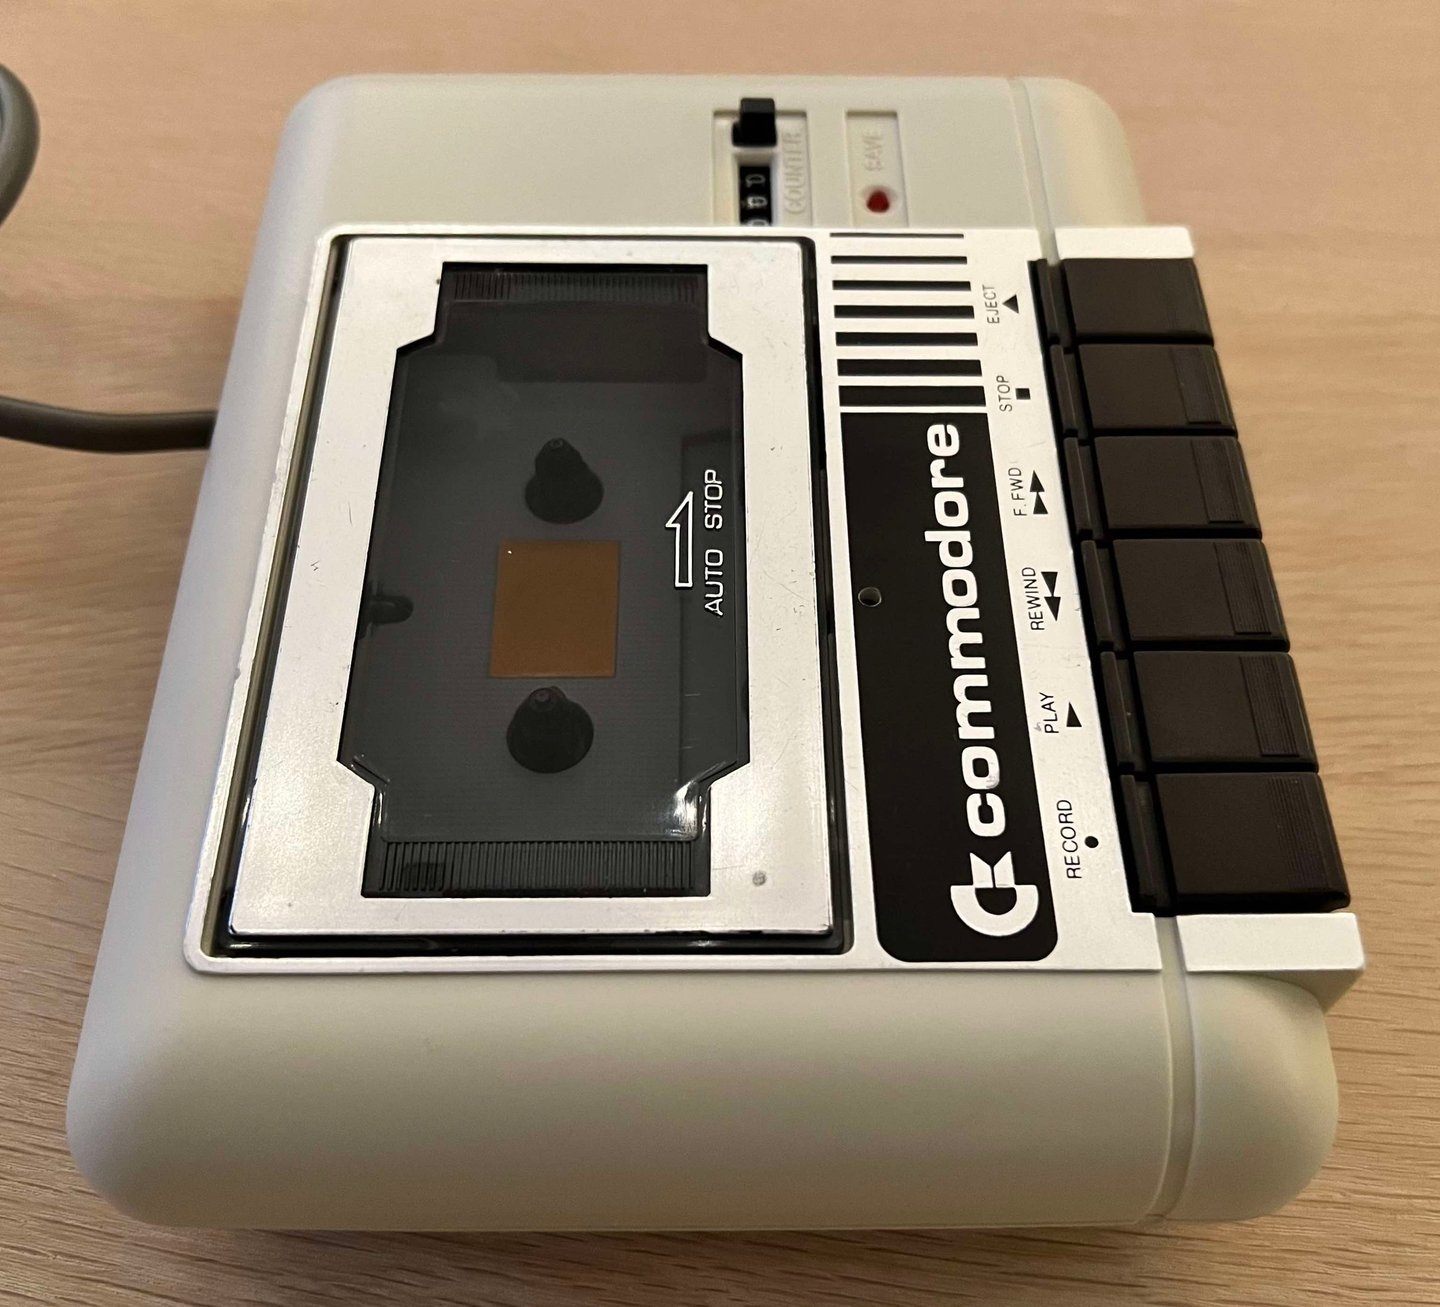
This 1530 (C2N) datasette does not look bad at all! Although, I have no idea if it works or not, but from the outside it looks to be in fine condition. It is quite dirty as it is quite full of dirt and grease. There is a small "K" badge (? - or fake tattoo?) on the front cover, and the covers are slightly yellowed.
There is a small label saying "09/88" at the bottom cover. Could it be a date code? I think so - September 1988.
It appears to be in good mechanical condition. That said, it could very well be that the mechanics do not work, but nevertheless I can´t notice any immediate mechanical faults. All push buttons appear to be working and the tap lid can open/close without any friction.
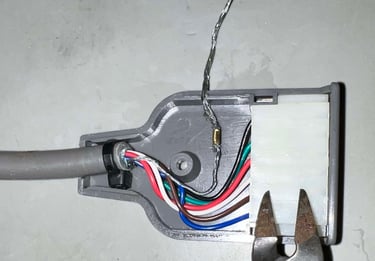
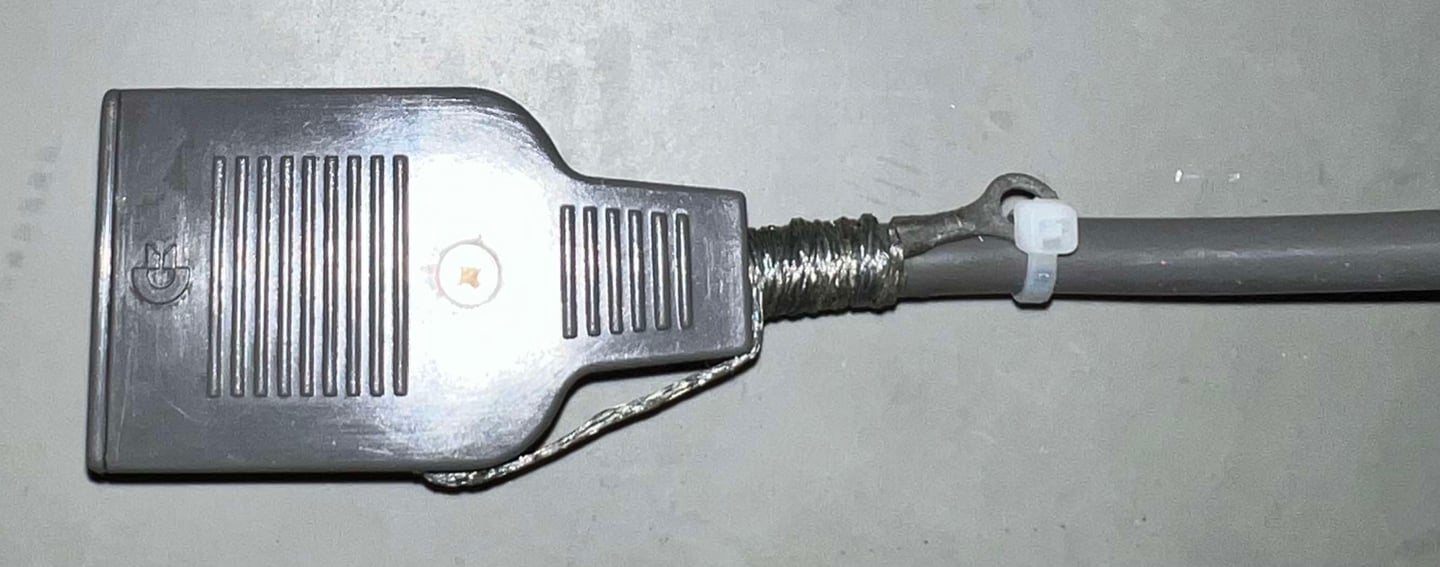
The cable and connector does not look too good. But it is (hopefully) cosmetic, and I really like the intention of wrapping the connector and ground wire together. The ground wire is not used on the Commodore 64, and the only thing it can do it to short circuit the machine if it accidentally gets into the user port.
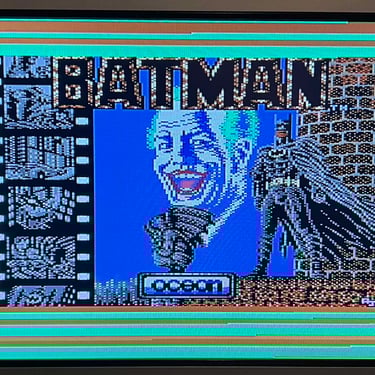
A nice little extra: there is an old cassette with a copy of "Batman the movie". Does it still work? Let´s find out!
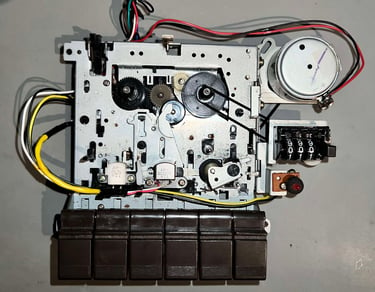
Below are some pictures of the datasette before refurbishment.


Refurbishment plan
To refurbish this 1530 datasette the plan is to:
- Clean and remove stains from exterior casing
- Clean the interior mechanics
- Check cable and replace strain relief
- Replace motor- and counter belts
- Check PCB (repair if required) and replace old electrolytic capacitors
- Check, and if necessary, adjust R/W head for optimal tape reading
- Check, and if necessary, adjust motor speed for optimal tape reading
- Verify datasette operation by testing
Note that these steps are not necessarily done in the order described above, and several of these steps are done in parallell.
Disassembly
Disassembling the 1530 (C2N) datasette is done through three main stages:
Disassembling the top- and bottom covers
Disassembling the six function keys
Removing the motor- and counter belt
Disassembling the top- and bottom covers
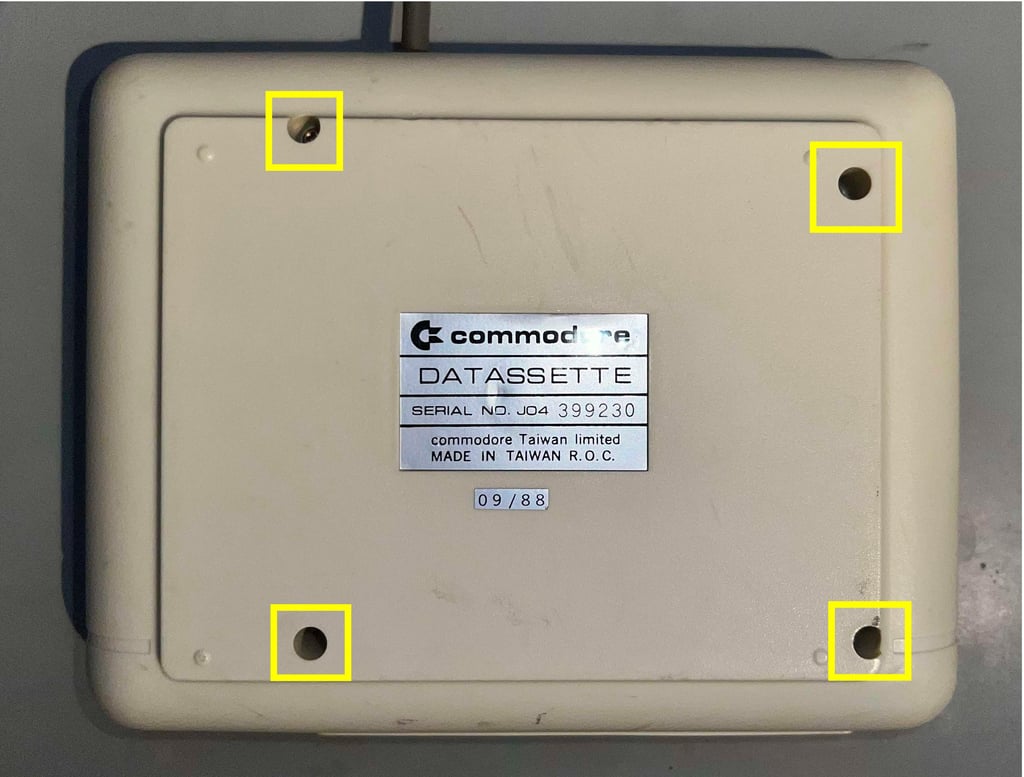
The first step is to remove the four Philips screws from the bottom side (3 x 12 mm).

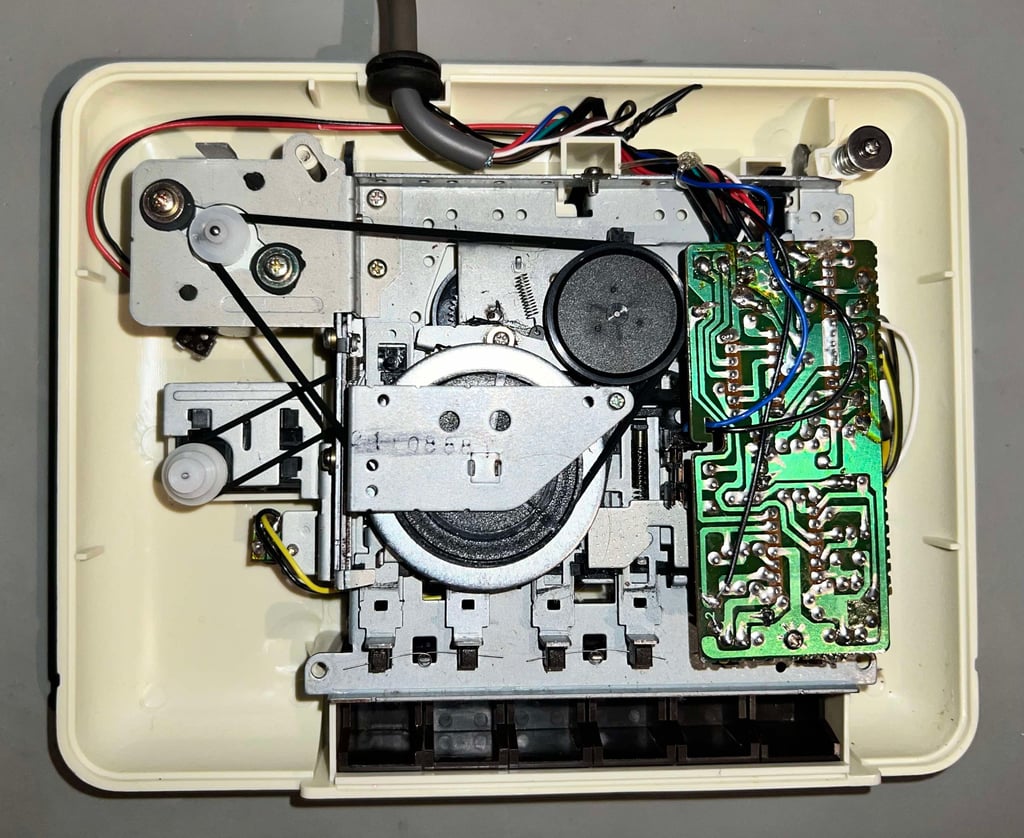
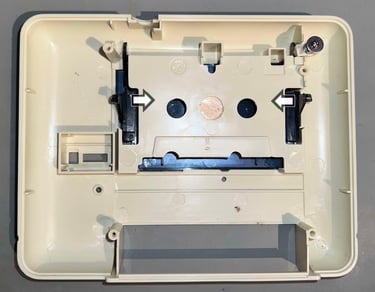
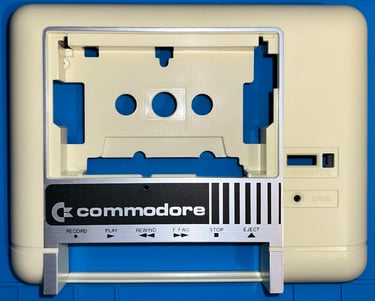
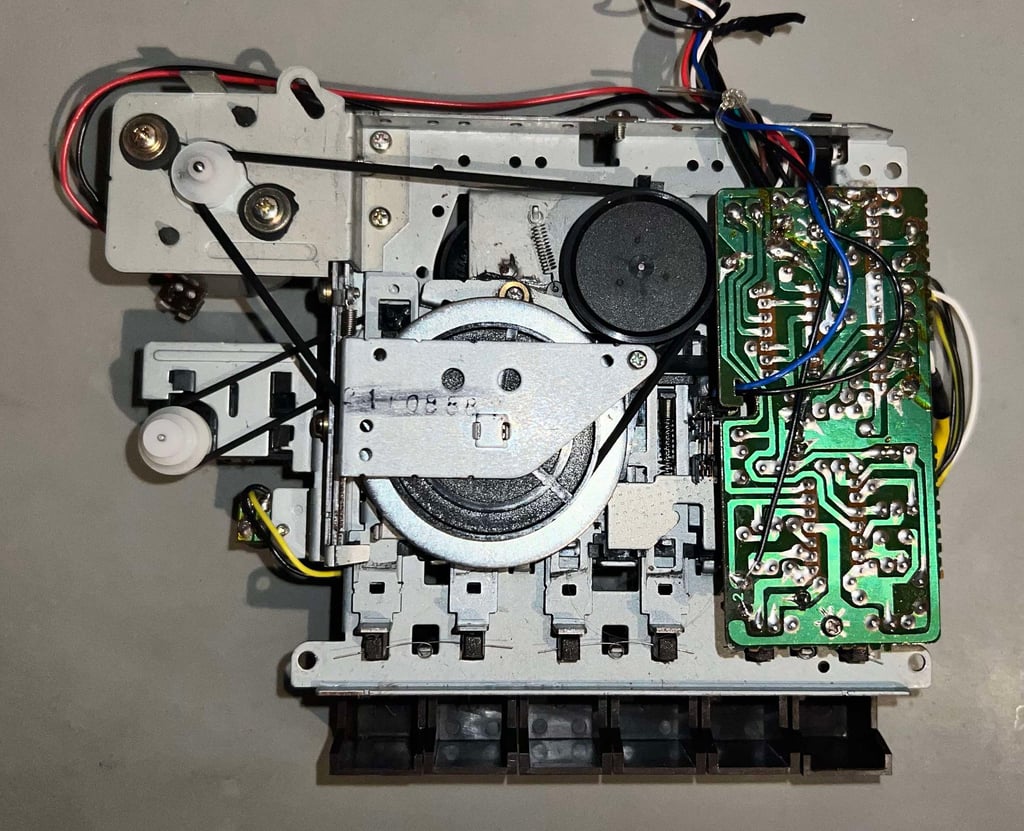
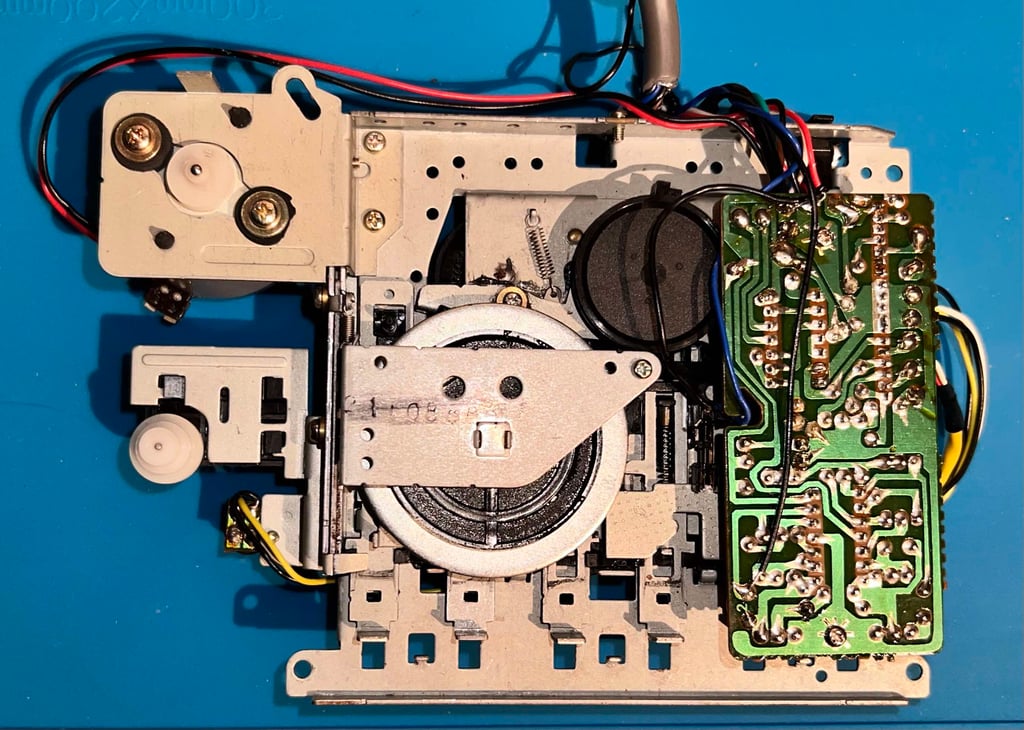
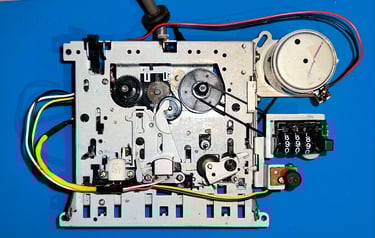
With the four screws out of the way, the bottom cover is lifted away from the top cover. This reveals the interior for the first time. It looks to be in quite ok condition; there is the normal dust and grease and also the motor- and counter belts have lost their elasticity. But all that is to be expected. There is something I discover (later - but it is very present in this picture): one of the wires is actually making a short circuit between two of the pins. Is this intentional? I do not think so.

The interior is carefully lifted of the top cover. As can be seen from the picture below the top cover is in quite good condition. To release the top lid the two plastic "rods" are carefully pushed towards the center of the lid while at the same time the lid is pushed outwards.

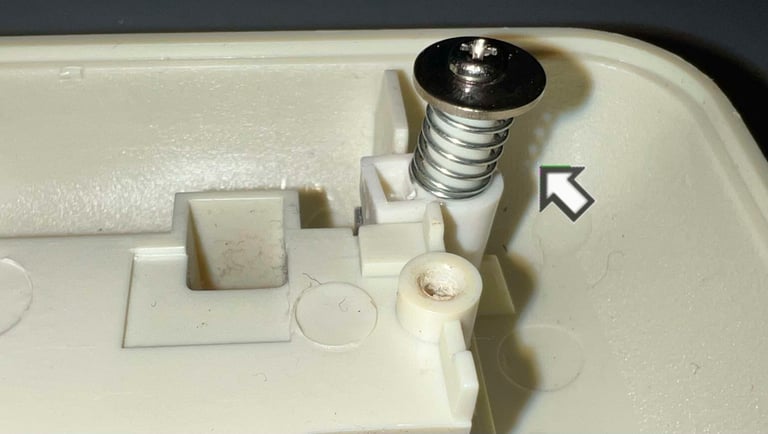
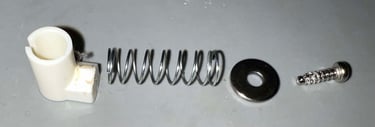
It is not strictly required, but good practice, to remove the spring mechanic in the top right corner. This small assembly consists of a screw, spacer, spring and a plastic wedge. The latter part was also lubricated with some grease which will be replenished at re-assembly.


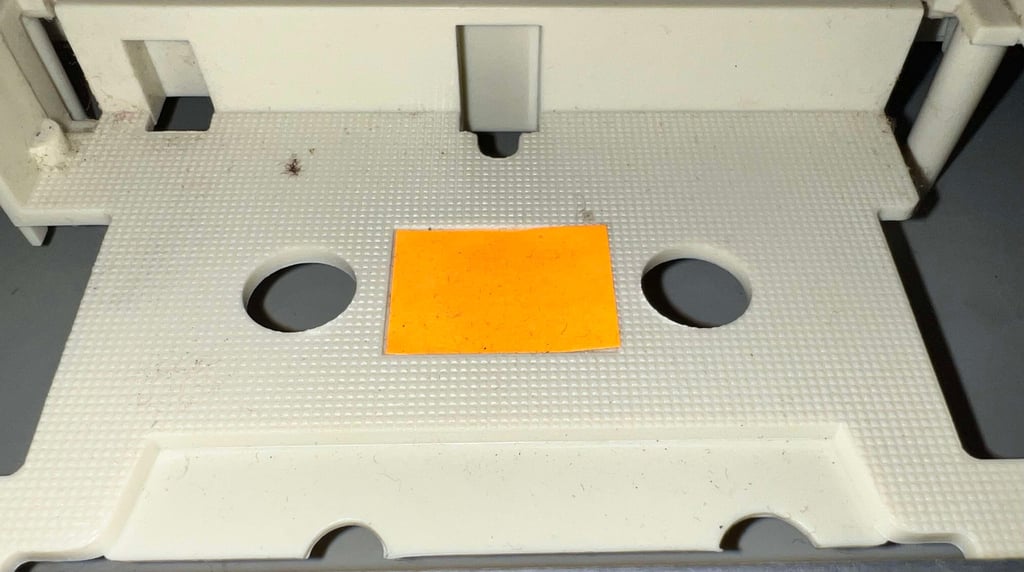
The coloured sticker on the top cover is carefully peeled off while applying some hot air from a hair dryer.


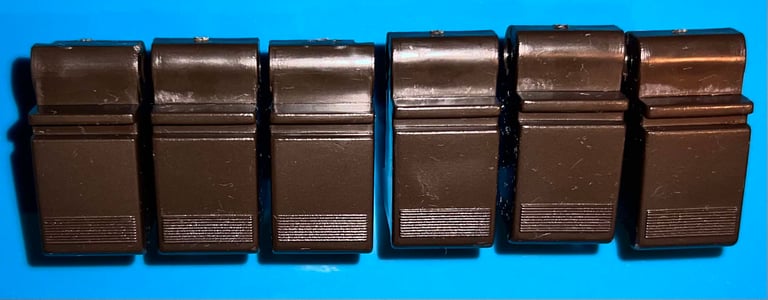
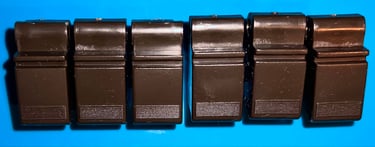
Disassembling the function keys
The first step in the process of disassembling the six function keys is to remove the three small springs at the back of the interior module. These springs are thread on three small metal tabs, and held in place by the force from the spring when inserted in the small notch in the keys. It can be a bit fiddly to remove these, but with a pair of tweezers (and some patience) they are removed.
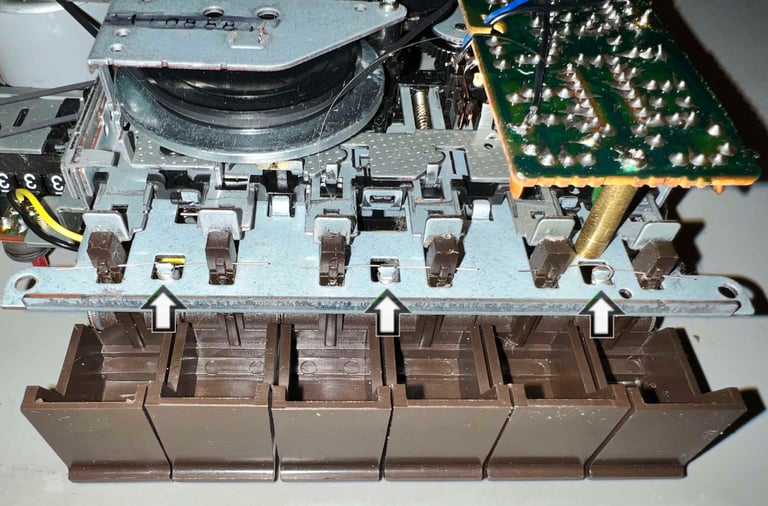

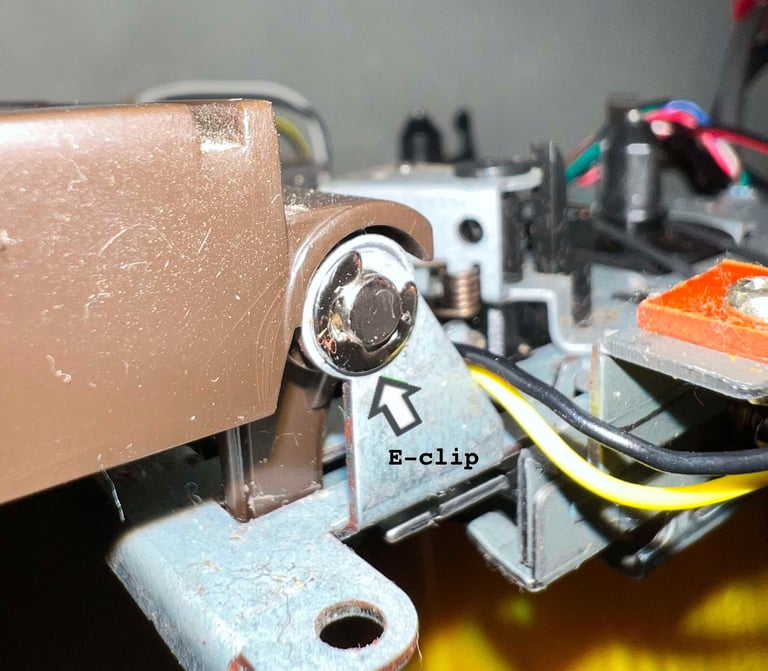
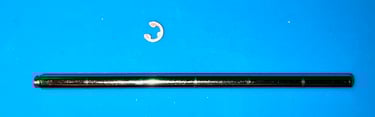
With the springs out of the way the rod holding the six function keys can be removed. There is a small E-clip at the right hand side (seen from above) which function as a lock for the rod. This E-clip is removed with a thin flat screw driver and the rod is carefully pulled out from the keys.


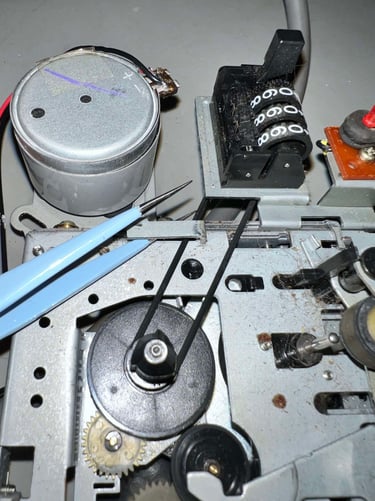
Removing the counter- and motor belt
Removing the motor belt is easy if you do not disassemble too much! But if you start removing several screws and/or springs you would very quickly end up in a very busy situation...
The removal of the motor belt is done in three steps:
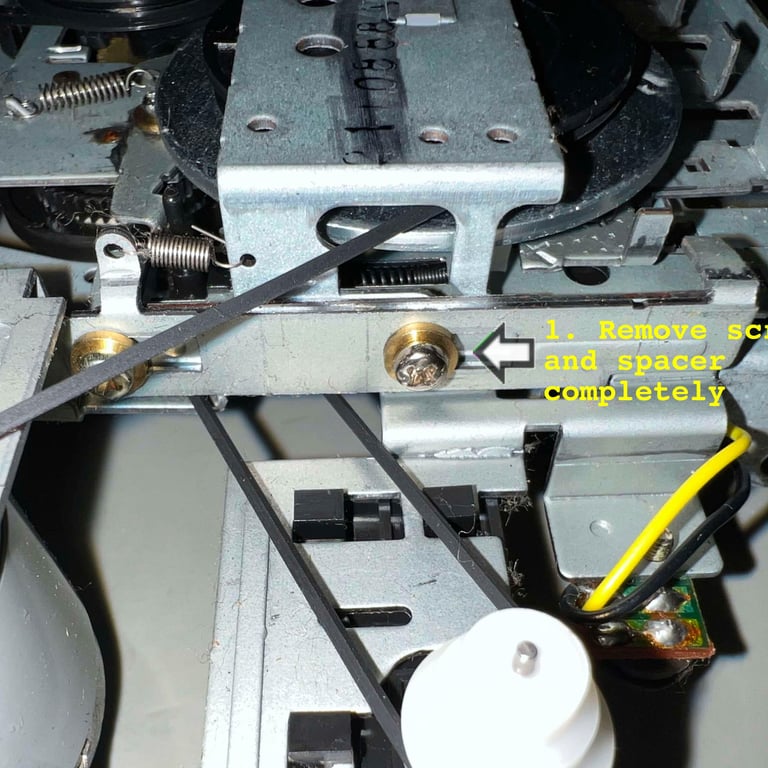
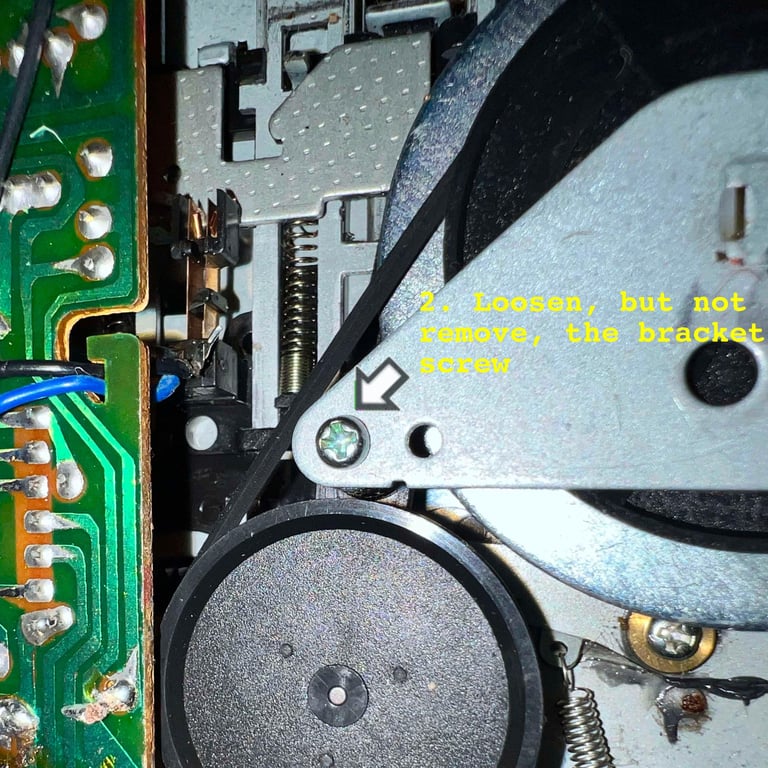
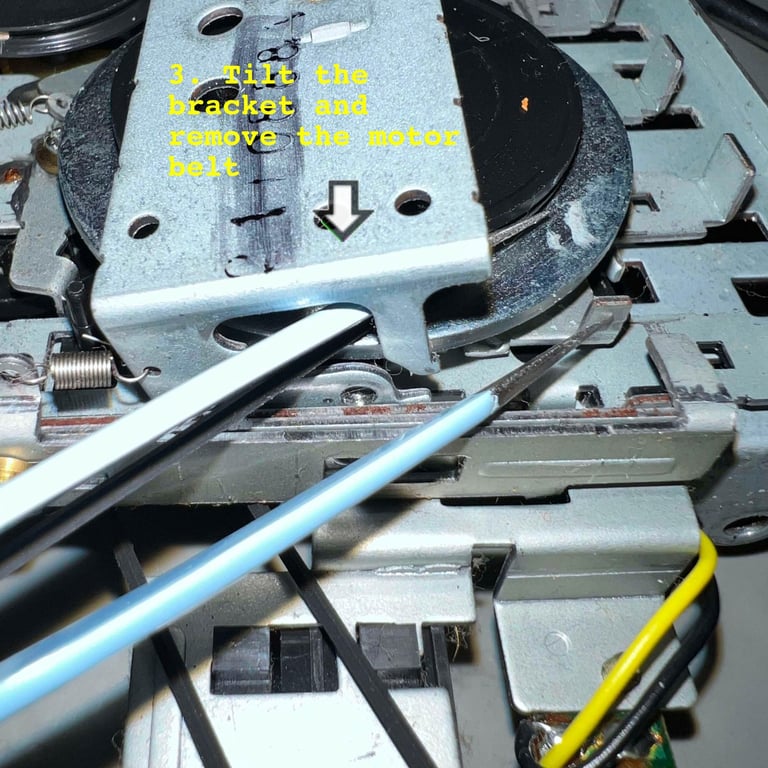
The screw mounted one side (and the small spacer) is completely removed
The screw mounted on top right side of the flywheel bracket is partly loosened
The flywheel bracket is carefully tilted and lifted to make room for the belt to be freed
Below is a picture gallery of these steps. Click to enlarge.
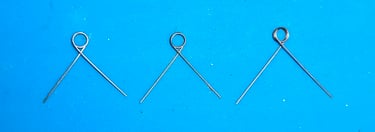
The removal of the counter belt is straightforward. A small spring-loaded metal pin/tab is holding it in place. This pin/tab is lifted while the counter belt is removed.

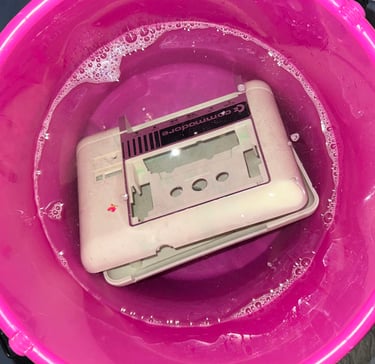
Exterior casing
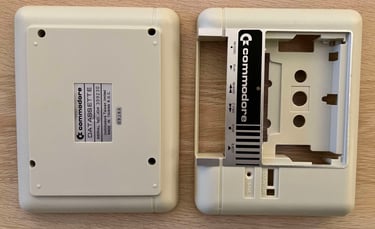
As mentioned in the opening chapter the exterior casing looks to be in good condition. There are some dirt and grease, slightly yellowed and a small "K" sticker (?), but this is not severe. To remove the dirt the top cover, bottom, the tape lid and the six function keys are placed in a bucket filled with mild soap water. They are soaked for about 24 hours.

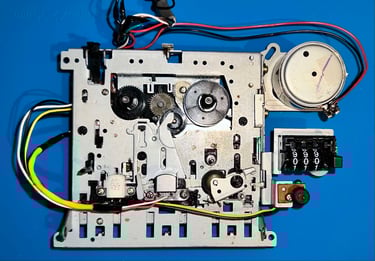
After cleaning the parts looks way better. All of the grease is done, and there are not much sign of use. Below is a gallery of the cleaned parts - before retrobrighting.


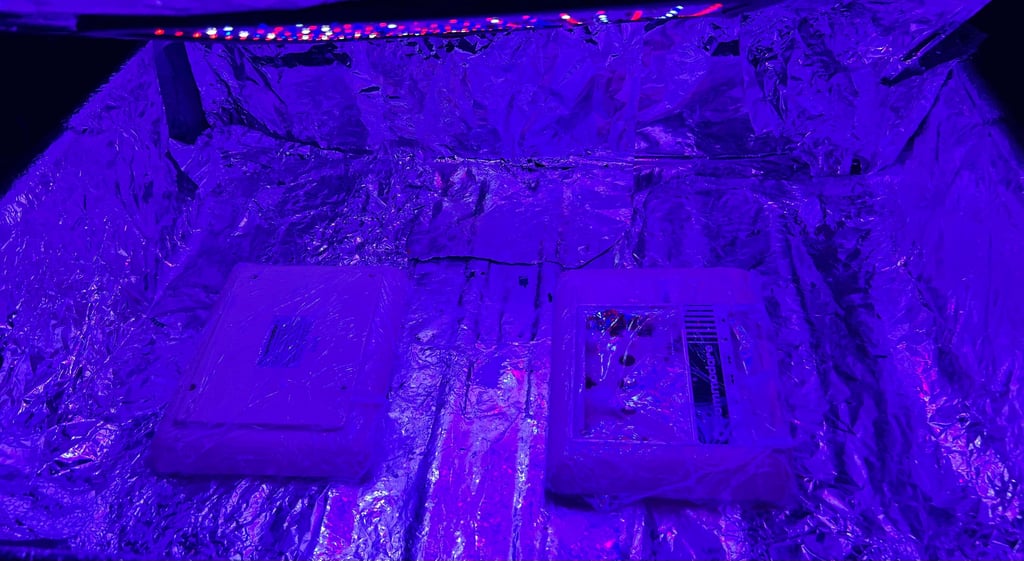
The top- and bottom cover is slightly yellowed so some retrobright is required. Some 12 % hydrogen peroxide cream is applied to the covers regularly for about 12 hours - and "sunbathed" with some UV light.
After retrobrighting the covers looks very good I think. Some small signs of use, but that is marginal.
Interior mechanics
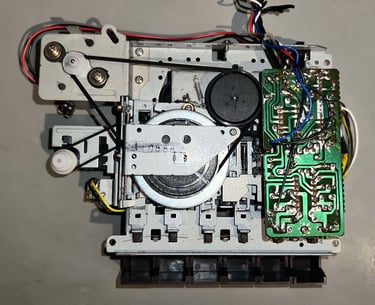
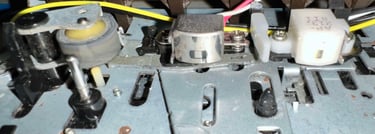
The interior of the datasette is in good condition, but after almost 37 years there obvious signs of aging. Quite some dust and grease, and the motor- and counter belt are worn out. There are very little sign of corrosion - almost nothing. Below are some pictures of the interior before cleaning.
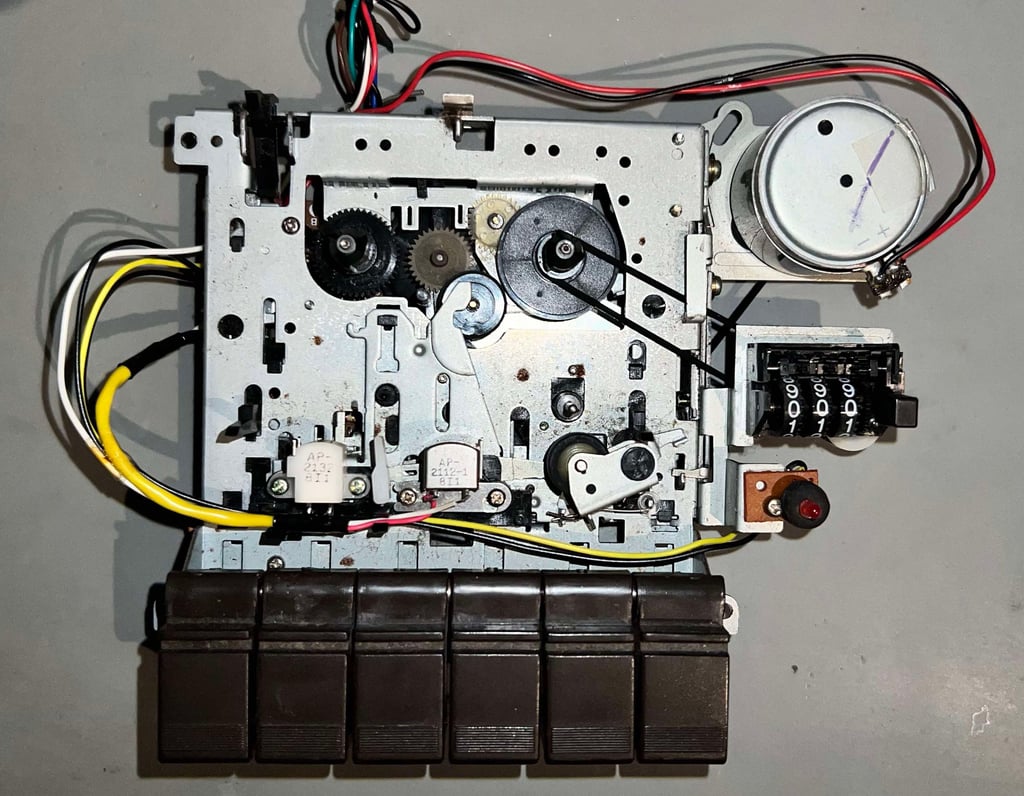
The interior is cleaned thoroughly with isopropanol and Q-tips. Note that the interior is completely disassembled (belts and function keys) when the cleaning is done. A small drop of silicone spray is applied to the three digit counter.


Cleaning the read head, capstan, pinch roller and moving parts
After new belts are installed, and the function keys re-assembled, the read head, capstand and pinch roller are cleaned. The reason for doring this when the datasette is partly re-assembled is that it can be connected to, and powered by, a Commodore 64. Functions such as PLAY/FF/REW can be activated which makes moving part... move! And while they are moving the parts are cleaned.
In the videos below this is shown how it is done. Note that these videos are not from the very datasette, but the principles are the same.


Below is a picture of the erase head, read head, pinch roller and capstan after cleaning.

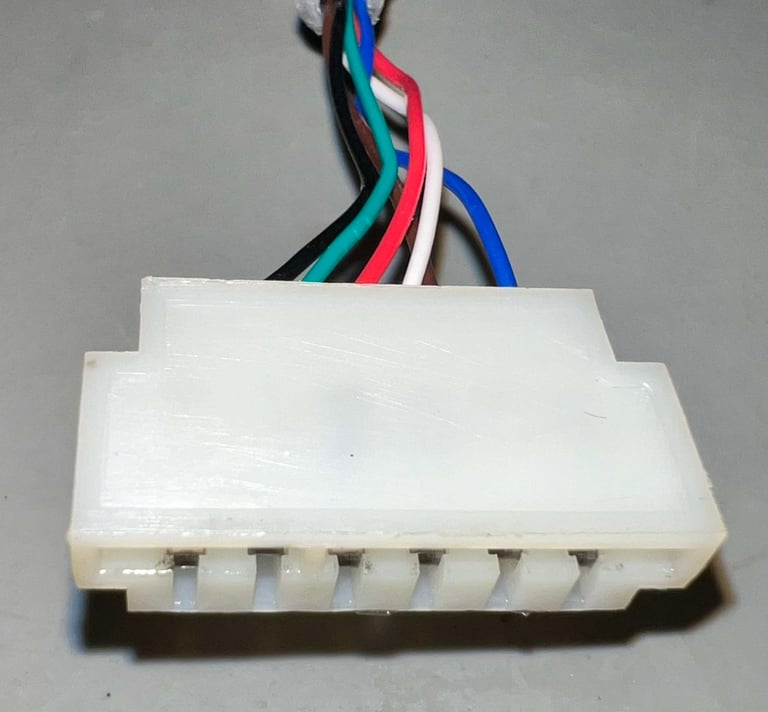
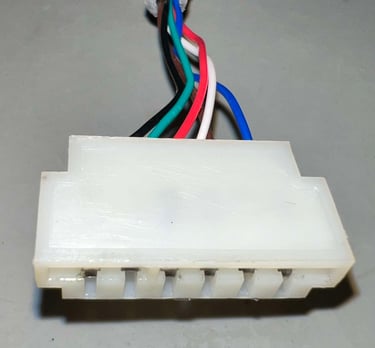
Cable and connector
Even if the connector does not look very nice, I am quite happy with it. A previous owner probably did take good care of his/her Commodore 64, and made sure that the useless ground connector was made unavailable to short circuit the machine.

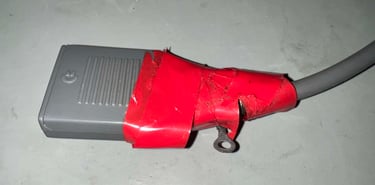
All of the red tape is removed and discarded. This reveals the rest of the connector, and adjoining cable, which all looks to be in good condition. To disassemble the connector the small Phillips screw is removed.

The connector covers are cleaned with mild soap water, glass cleaning spray and some isopropanol.

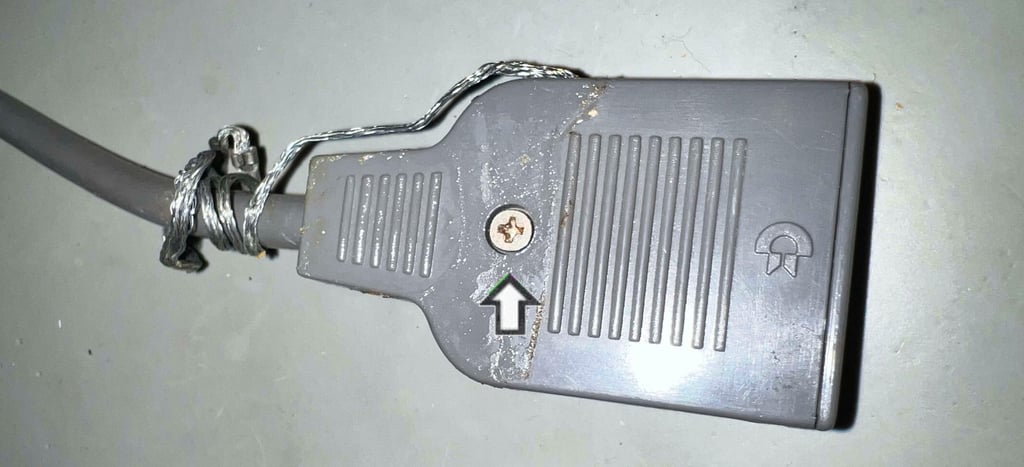
All of the six pins in the connector head are cleaned with contact cleaner. And they look to be in fine condition with marginal oxidation.
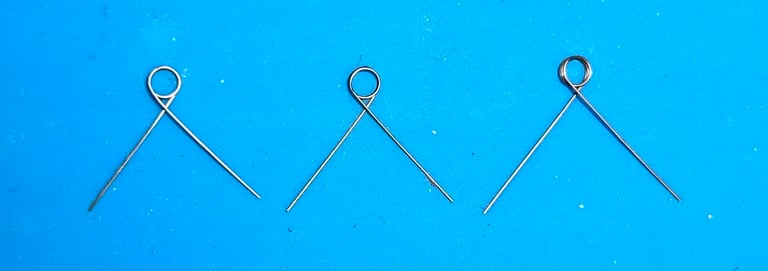
A small trick to secure that the cable stays in place is to add a small internal strain relief. With a thin cable tie, wrapped around the cable, inside of the connector casing the cable will not be able to pulled out easily. See picture below (the wire cutter is just there to keep the connector in place while taking the picture).
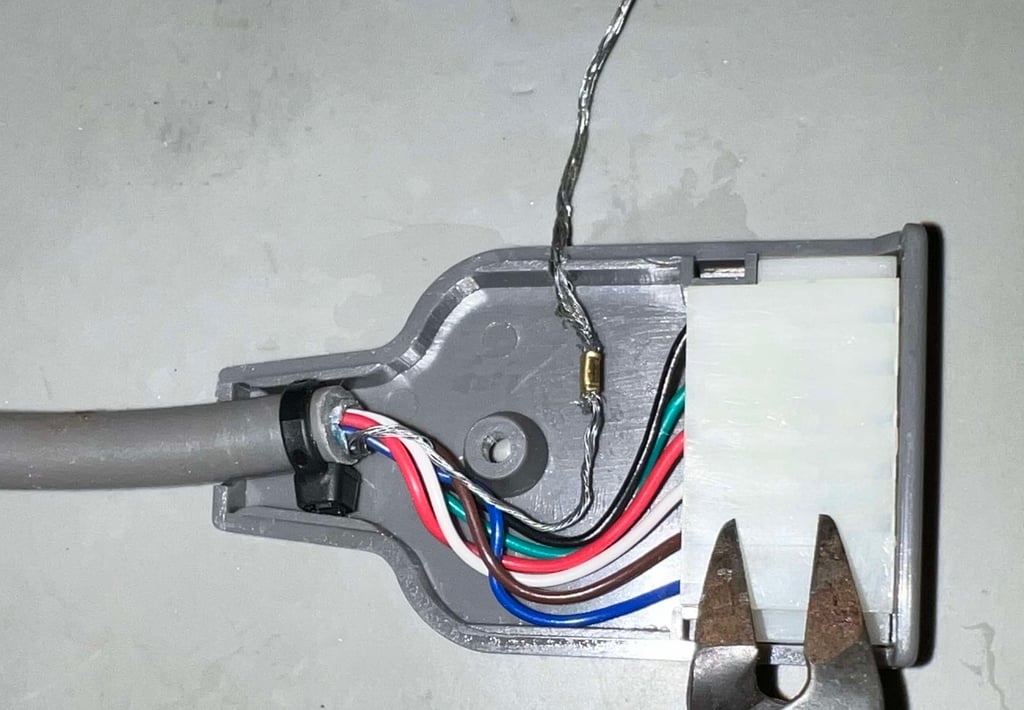
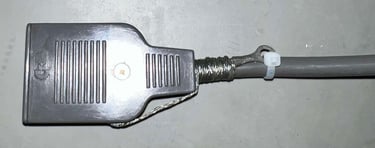
The connector housing is re-assembled, and a new cable tie is used to secure the ground wire away from the Commodore 64 User Port. Also, the cable is cleaned with some glass cleaning spray and isopropanol.
Replacing the belts
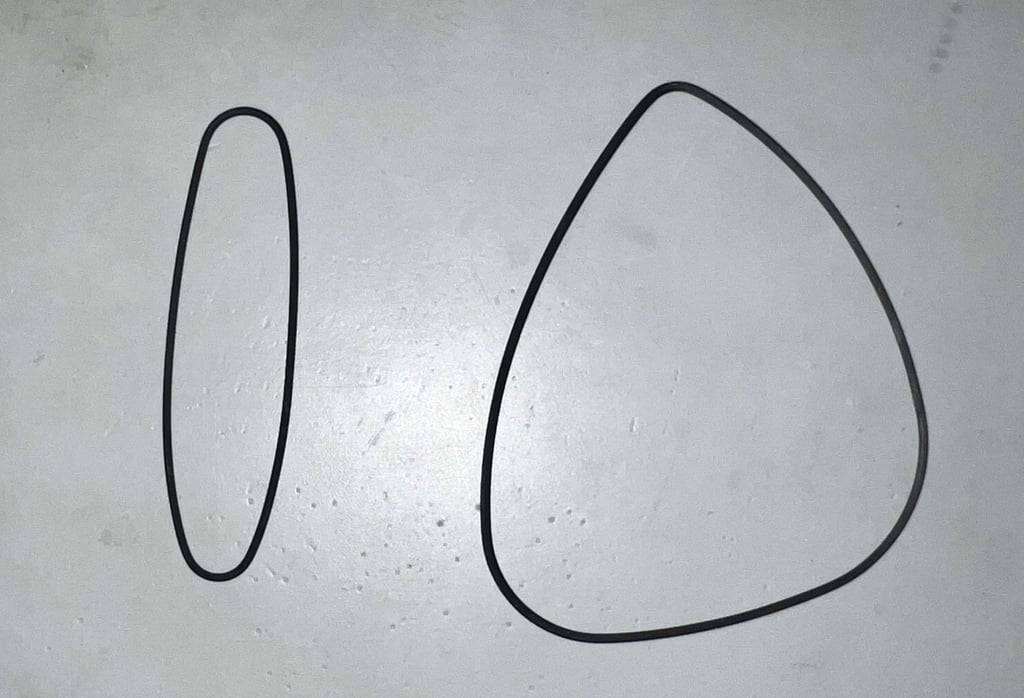
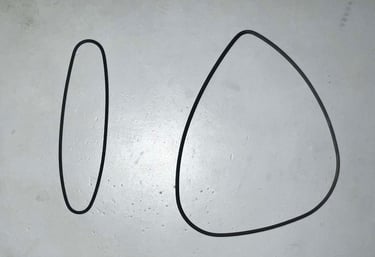
The motor- and counter belts are worn out. Not due to heavy usage, but age. After almost 37 years the elasticity in the rubber belts are gone - leaving the belts completely dry and deformed. The belts should be almost circular when not installed in the datasette, but as can be seen from the picture below they are not. They now have the shape of... eh... well... I don´t know?
When replacing the belts there are some important things to be aware of:
In the context of belts there are two major versions of the datasette; one "Made in Japan" version and one "Made in Taiwan" version. You can not use a "Made in Japan" belt in a "Made in Taiwan" version and vice versa.
The length of the belt must be the same as the original. Using a belt too long, or too short, could prevent the datasette from operating as it should
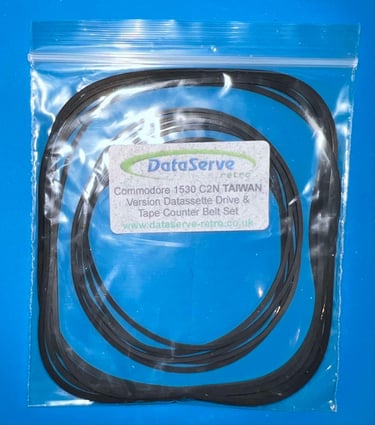
I get my counter- and motor belt from DataServe - Retro. They provide quality belts, with the right sizes. This version which is currently worked on is the "Made in Taiwan" so those are the belts I will use here.

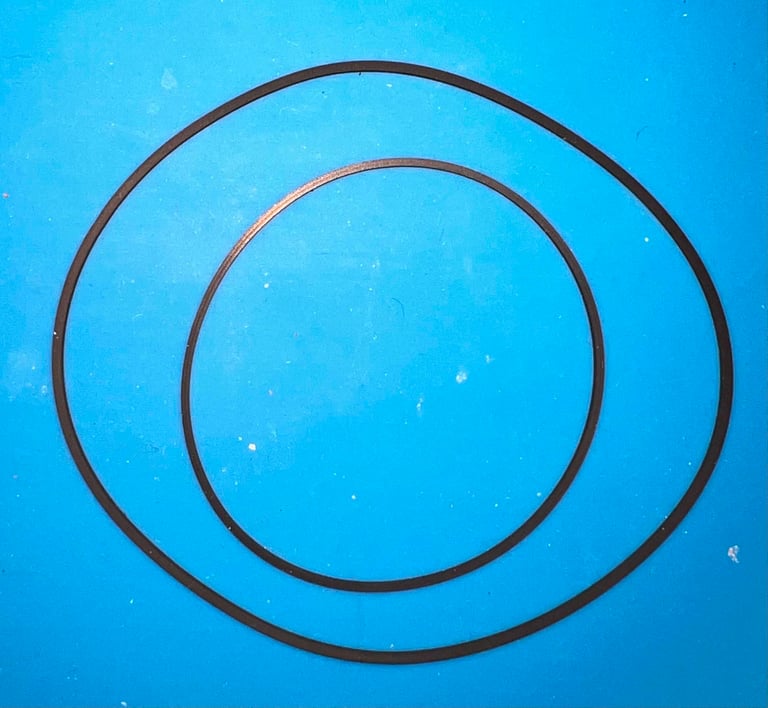
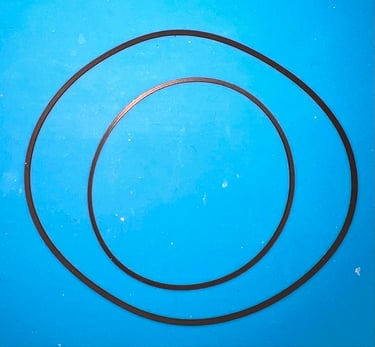
Below are some pictures of the datasette interior with the new motor- and counter belt installed.

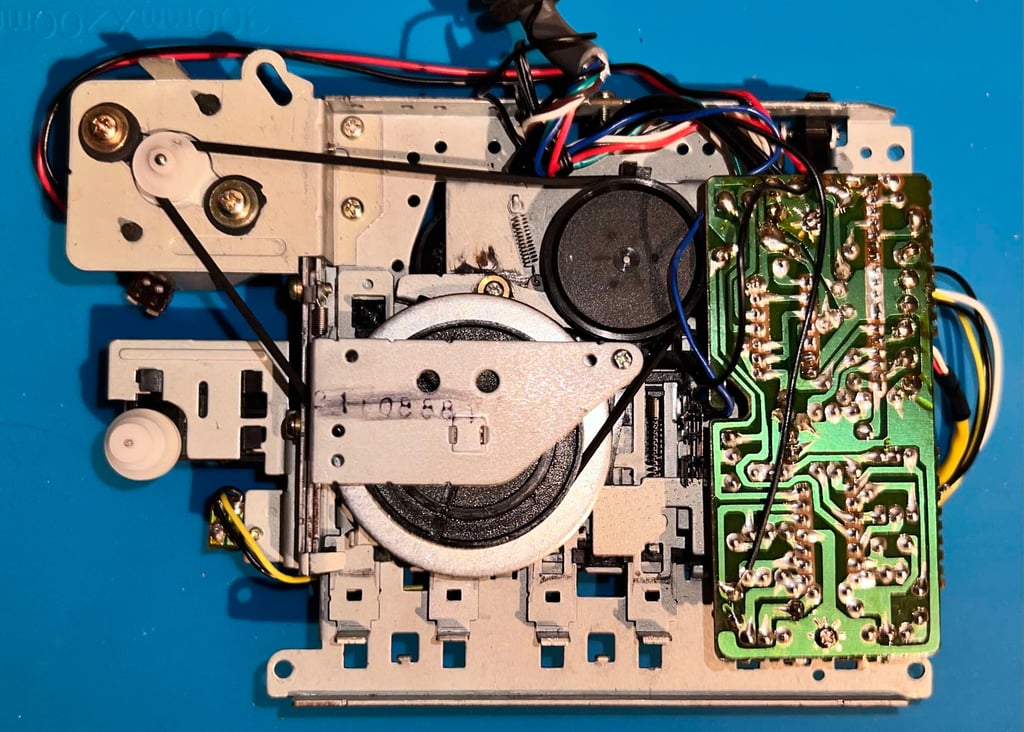

PCB and electrolytic capacitors
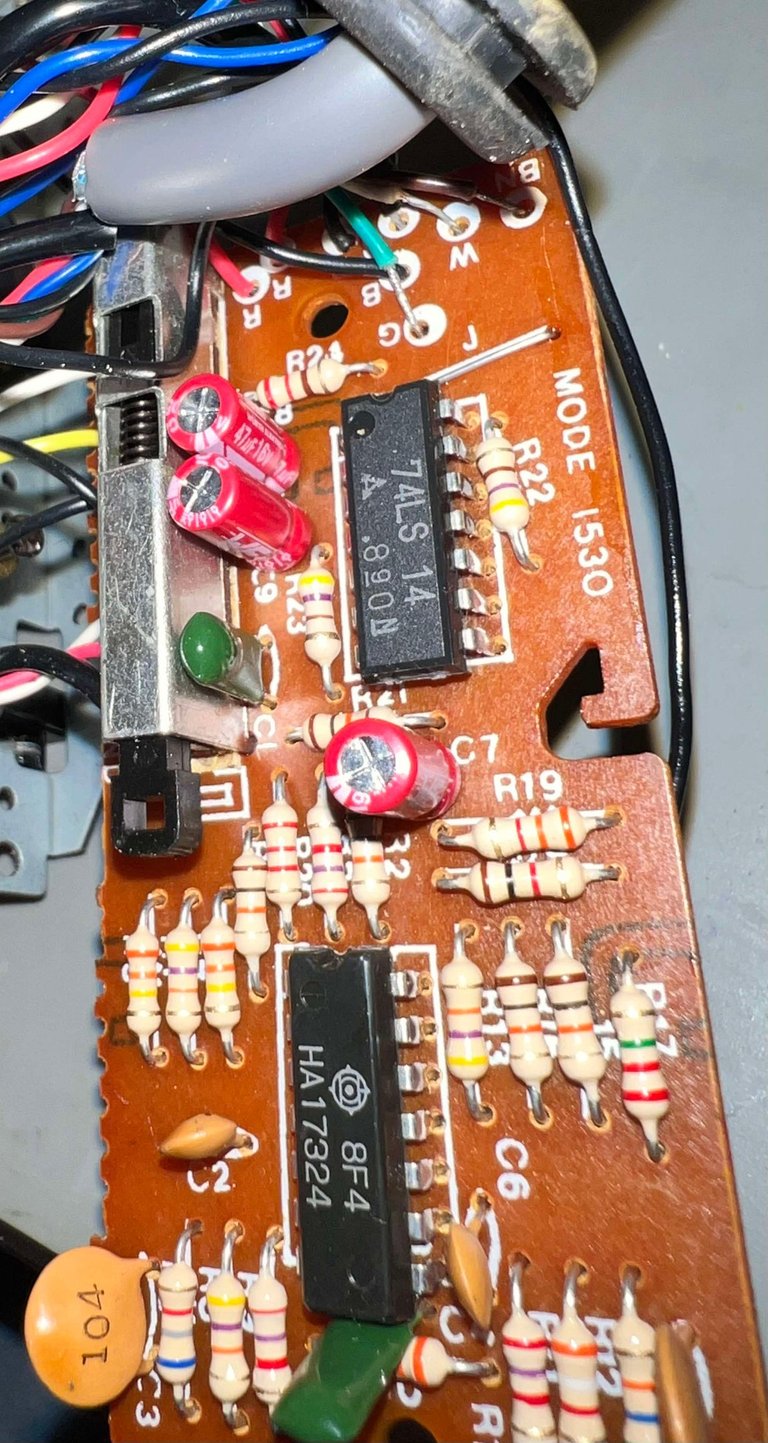
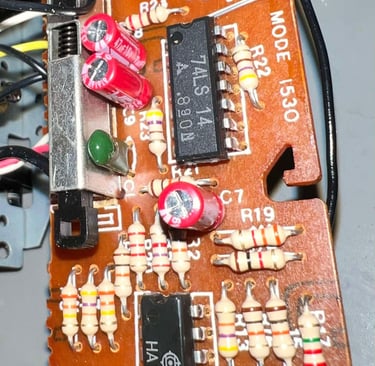
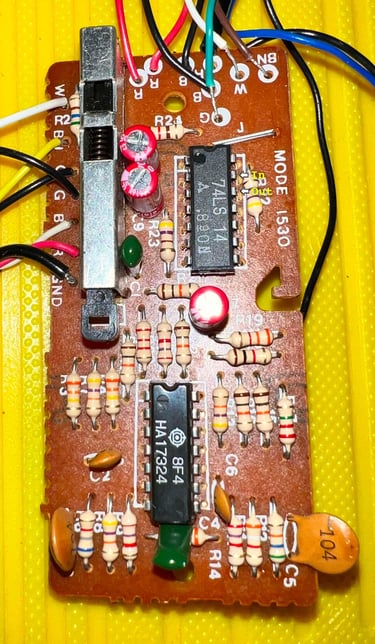
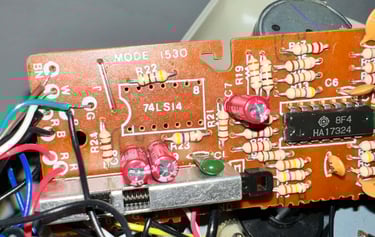
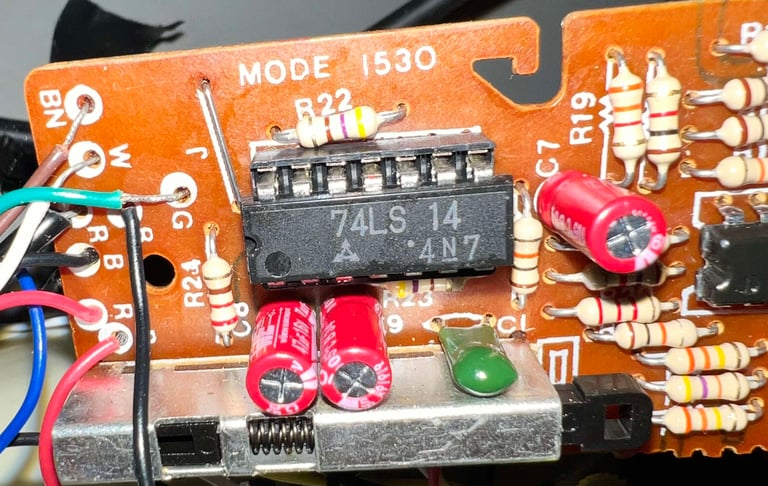
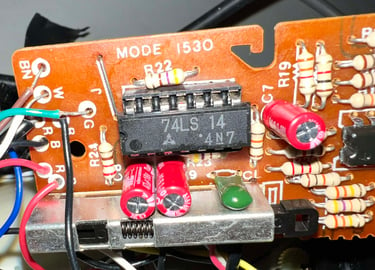
This is quite interesting. I don´t think I have ever seen this PCB version in a datasette before. Not that I think it is rare in any way, but this is a new version to me at least. I will call this version "MODE 1530" as this is the only identifier I can find on the board (will be visual in pictures later on).
Initial testing
Before any refurbish is performed on the PCB a quick test of the datasette is performed. And it turns out that even if the motor spins, the cogs are turning and "all seems good" there are no signal whatsoever out of the datasette.
Faults investigation
Since I do not know which PCB version this really is, I have not been able to identify the schematics (I don´t know if its really available either). Nevertheless, the principles behind the different PCB version are more or less the same:
The analog signal from the read head is fed to the first OPAMP
A chain of four OPAMS will gradually amplify the analog signal until it saturates and "become" digitised at the final stage of the chain
a pair of hex inverters functions as a buffer between the OPAMPS and the Commodore 64 making the signal a proper TTL digital signal
In the schematics below (taken from another PCB version) you can see the three stages. This datasette is expected to follow the same principles.
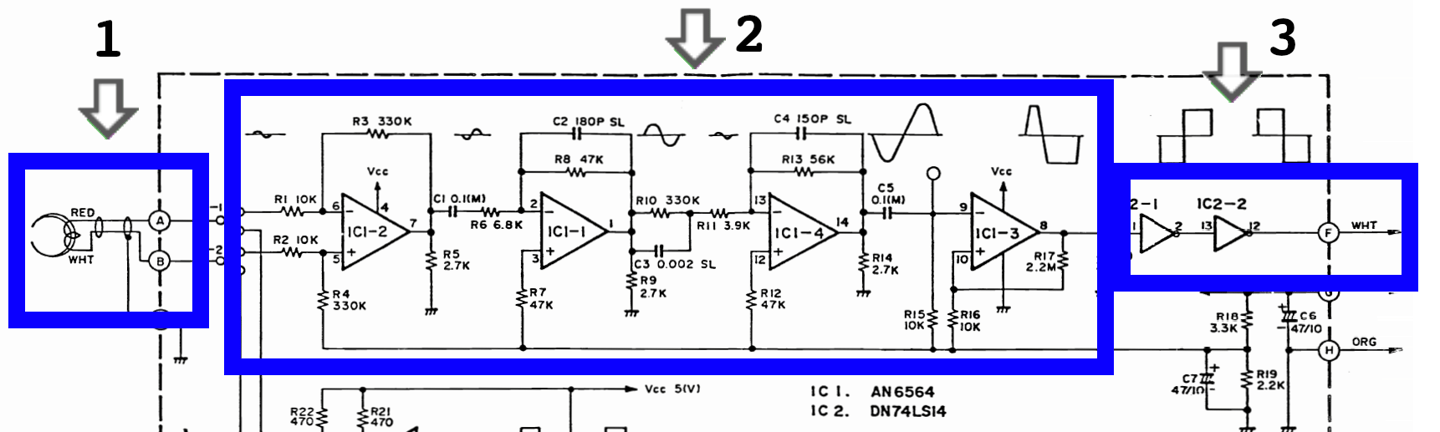
Where the signal is lost between segment 1-3 I do not know at the moment, but needs to be investigated.
Disassembling the PCB from the interior
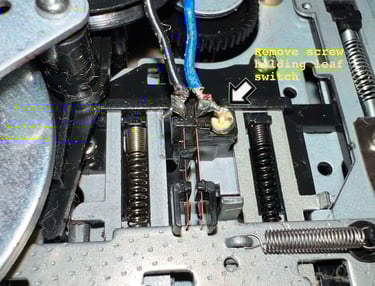
The PCB is removed from the interior mechanics by removing the two screws. In addition, the transparent rubber (?) band is removed from the wire bundle. Notice that there is quite some flux residue on the PCB, but this should not affect the functionality of the board in any way.
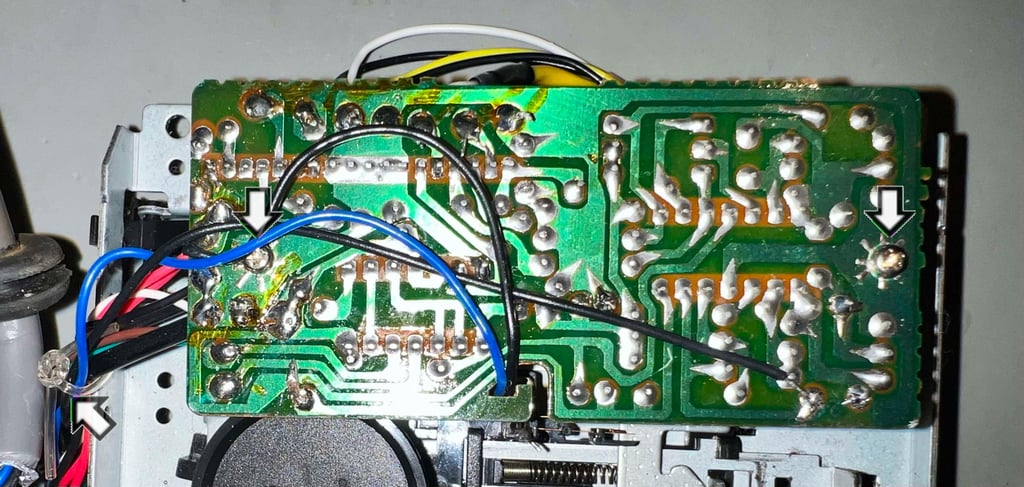
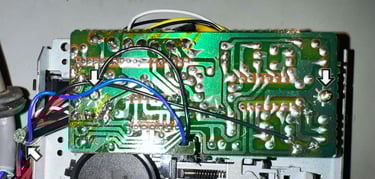
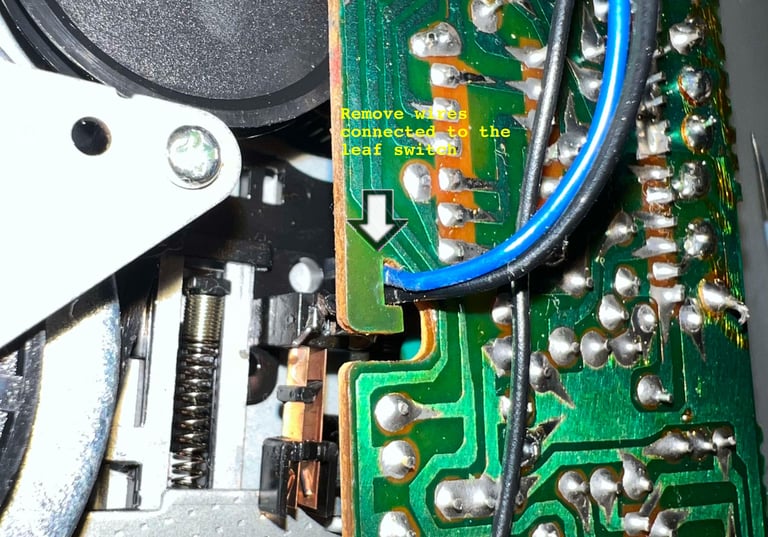
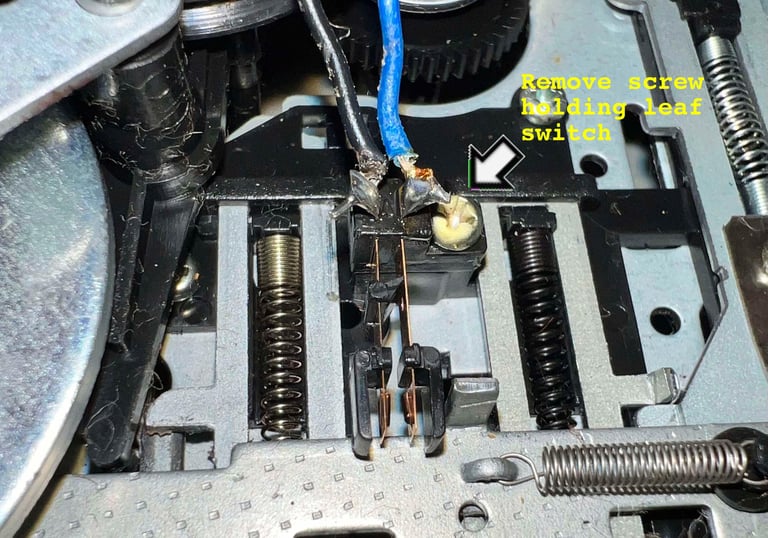
With the two screws out of the way, the PCB is loose but not completely freed. The next step is to carefully navigate the blue and black wire (see picture below) out of the small notch in the PCB connecting the leaf switch. Finally, the small screw holding the leaf switch is removed.

Visual inspection
There are nothing obvious candidates to the fault of no signal output. Nevertheless, there are some areas which are inspected and fixed (see pictures below):
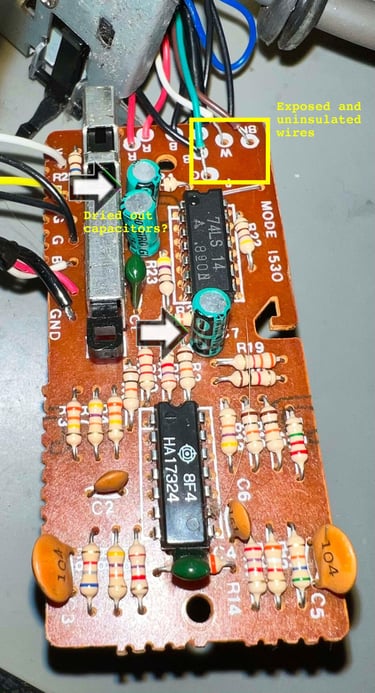
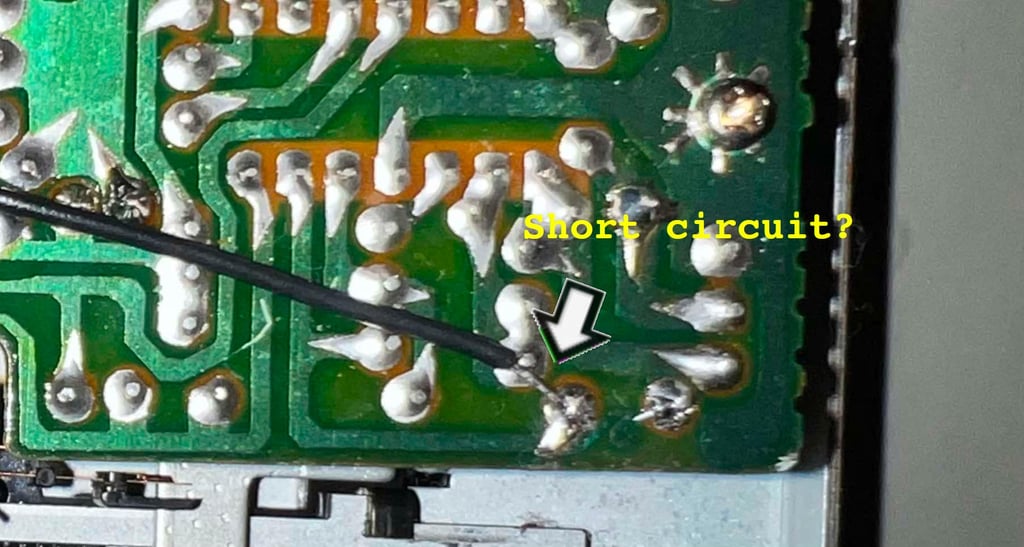
There is a wire which appears to short circuit to another solder point on the PCB
Some of the wires (BN, W and G) where a large part of the wire is exposed and uninsulated
There are three electrolytic capacitors. I can not see any leakage, but one or more of these might be dried out


Replacing the electrolytic capacitors
There are three 47 uF [16V] electrolytic capacitors on the PCB. All of these are replaced with new capacitors from Wurth Electronics.
Fault identified
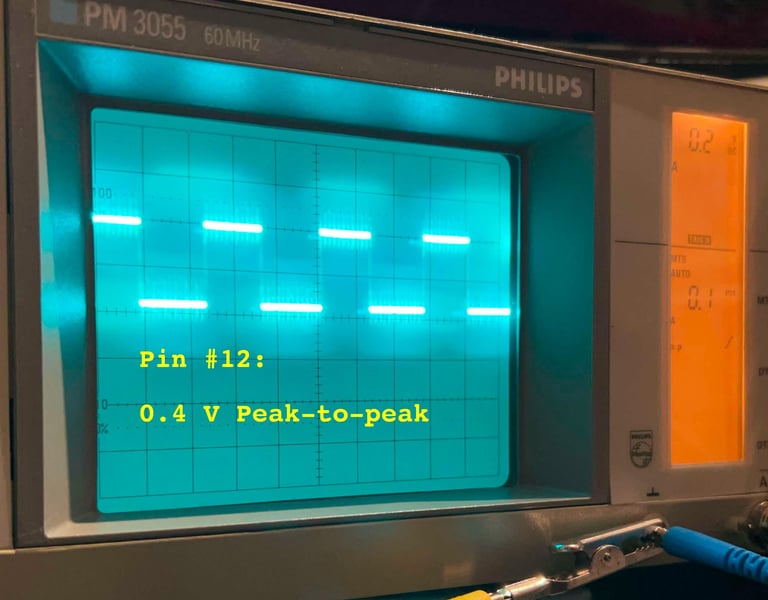
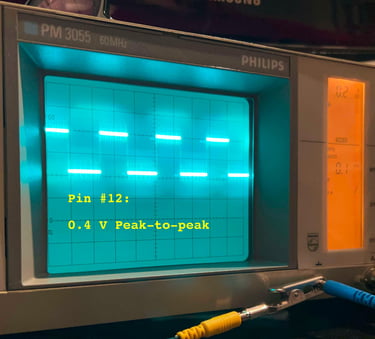
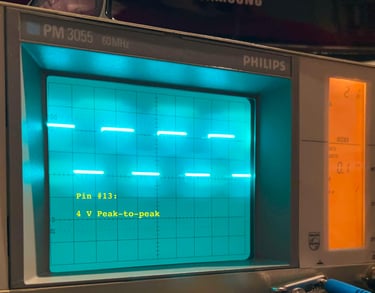
With the oscilloscope the fault is identified. The 74LS14, which contains six hex inverters, seems to have an issue. At pin #13 (marked "In" at the picture below) there is a valid TTL input with voltage levels at ranging from 0 V to about 4 V. With this input the 74LS14 should then give a reverse input where 0 V -> 5 V and 4 V -> 0 V. But it does not. Instead the output voltage ranges from 0 V to 0.4 V only which is obviously wrong. Such a signal will be considered LOW at the reception at the Commodore 64.
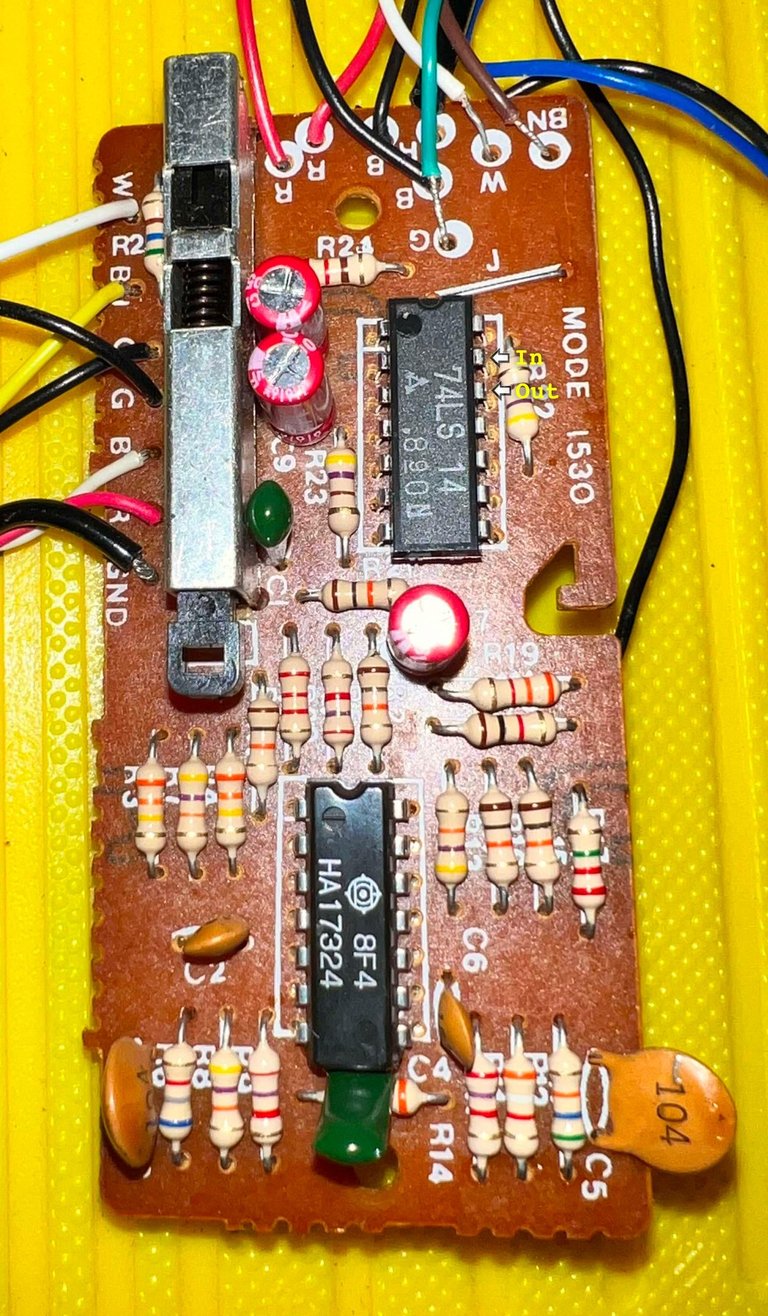
As can be seen from the pictures below the output signal at pin #12 is only about 0.4 V peak-to-peak, while the input signal at pin #13 is about 4 V peak-to-peak. The output signal at pin #12 should be TTL level ranging from 0 V (LOW) to 5 V (HIGH). NOTE: In the pictures below the oscilloscope is set to 0.2 V/DIV (pin #12) and 2 V/DIV (pin#13). As a consequence the height of the pulses are equal, but the VOLT/DIV is different.

Repair
As far as I can see, since I do not have the schematics, the pin #12 is directly connected to the datasette port 4-D. That means that there is nothing which could pull the voltage level down, unless there is some kind of short circuit which there is not at this point. So it seems like the 74LS14 is marginal, and must be replaced. Note that I say "marginal". The rest of the five hex inverters seems to be working ok. It is just this one which is showing this weird symptom.
The 74LS14 is replaced with a socket and a modern replacement chip. See pictures below.

Is the repair a success? Yes! With a new 74LS14 installed the output on pin #12 is now with the correct TTL levels for the datasette and Commodore 64 to operate as it should.
Also, the exposed wires and "black-short-circuiting-wire" is fixed after the 74LS14 is proven to be working.
Tape head azimuth alignment
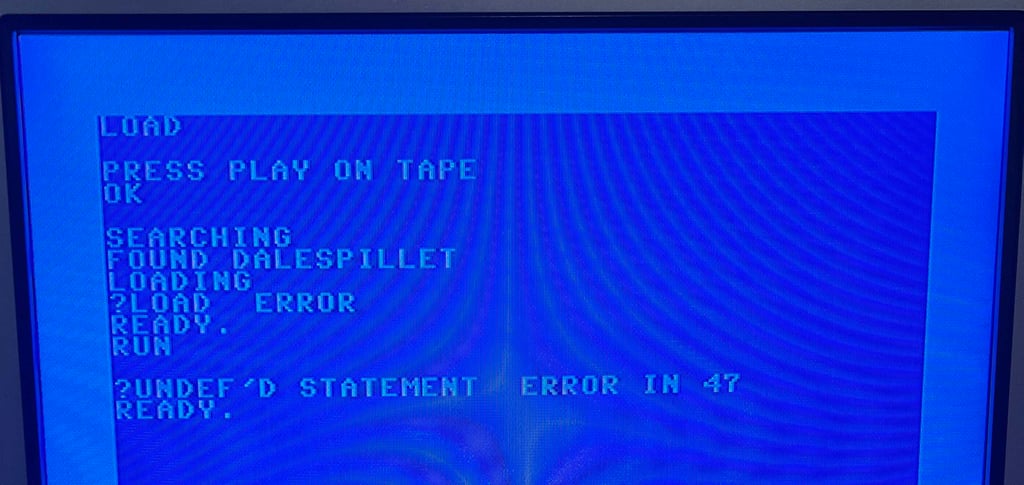
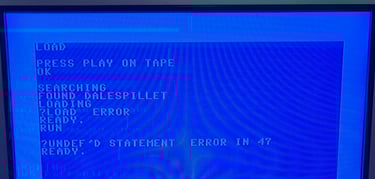
In addition to replacing the belts it is crucial to check the tape head alignment and if necessary adjust it. Otherwise the datasette can´t load our beloved tapes without the notorious "?LOAD ERROR", or simply just fails loading.
A detailed article about how I align the tape head can be found here. As seen in this article I use both an oscilloscope and C64 software to do this operation in two stages:
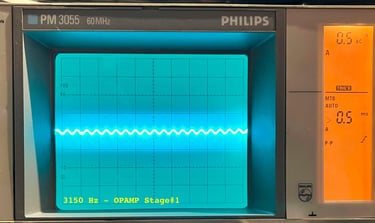
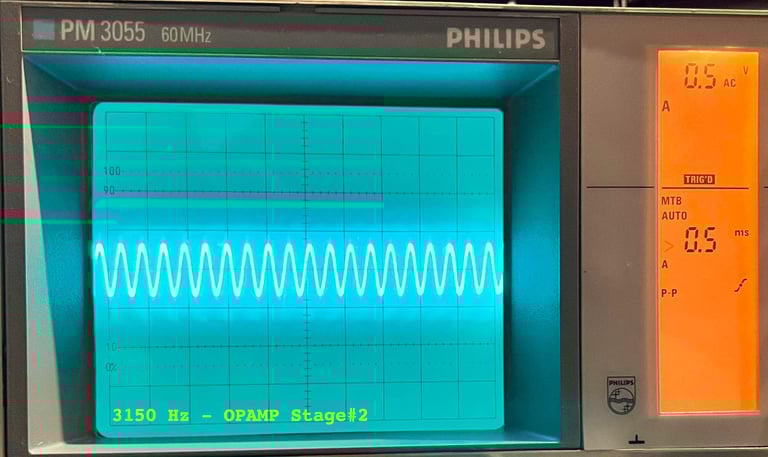
The first stage I solder on two wires after the 2nd OP-AMP stage, connect the oscilloscope to these wires and then adjust the R/W head until I find the maximum amplitude on the oscilloscope. Note: if the amplitude appears to already be at maximum before tuning it is good practice to wait with further adjustment of the R/W head.
Second stage I use cassette-azimuth software running on a Commodore 64 while loading games from tape. In this second stage I do not do any adjustments - I only validate that the adjustment done in the first stage is correct.
Note that the datasette needs to be completely re-assembled when checking, and eventually calibrating, the R/W head alignment.
Stage 1 - Aligning the tape head with the oscilloscope
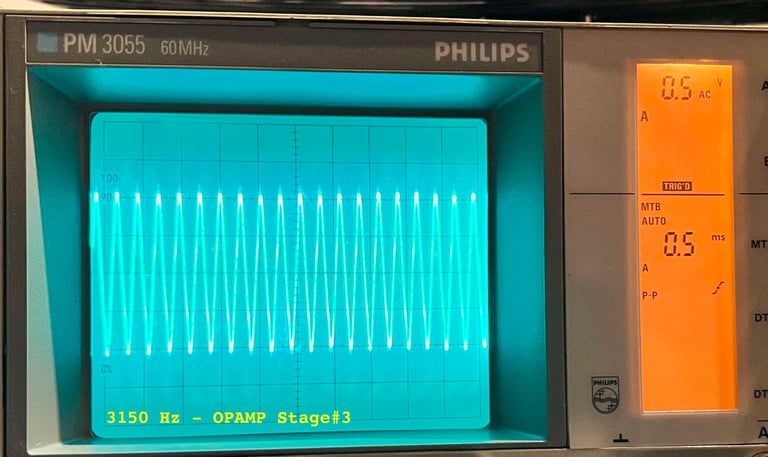
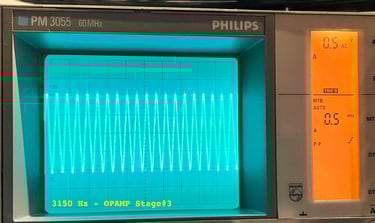
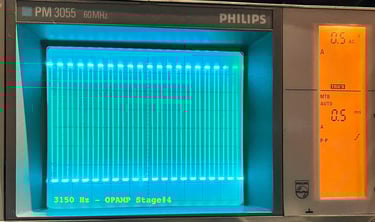
Although it is sufficient to measure only at the 2nd OP-AMP stage, I choose to go "all-in" on this one. I solder wires to measure all of the four OP-AMP stages; from the first pre-amp until fully saturated digital signal. Why? Well, since this datasette was faulty before repair I now would like to verify that the signal is in fact processed as it should from the output of the R/W head, amplified in the four OP-AMPs and fed into the two hex buffers. In the picture below you can see all the wires, but it is only the two marked with arrows (GND and OPAMP#2 which is strictly required). NOTE: In the picture below the "black-short-circuit-wire" is still there. But it was fixed after the picture was taken.


Below are some pictures from the head alignment process. As can be seen the signal is fed into the OP-AMP chain, amplified and saturated becoming a digital signal. The R/W head is adjusted so that the optimal peak-to-peak levels are gained at the 2nd OP-AMP stage.


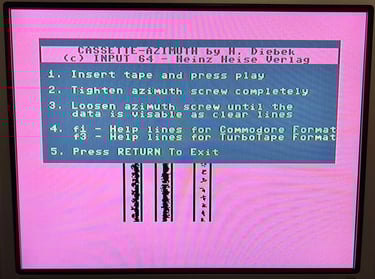
Stage 2 - Verification of the adjustment
To verify the adjustment with a second tool I use the cassette-azimuth software running on a Commodore 64. When the tape is loading there should appear three vertical bars on the screen. And the goal is that these three lines are as "solid" as possible. Note that these lines will never be completely solid, but the goal is that they are more or less straight vertical lines. If you have a misaligned R/W these lines will be scattered all over the screen.

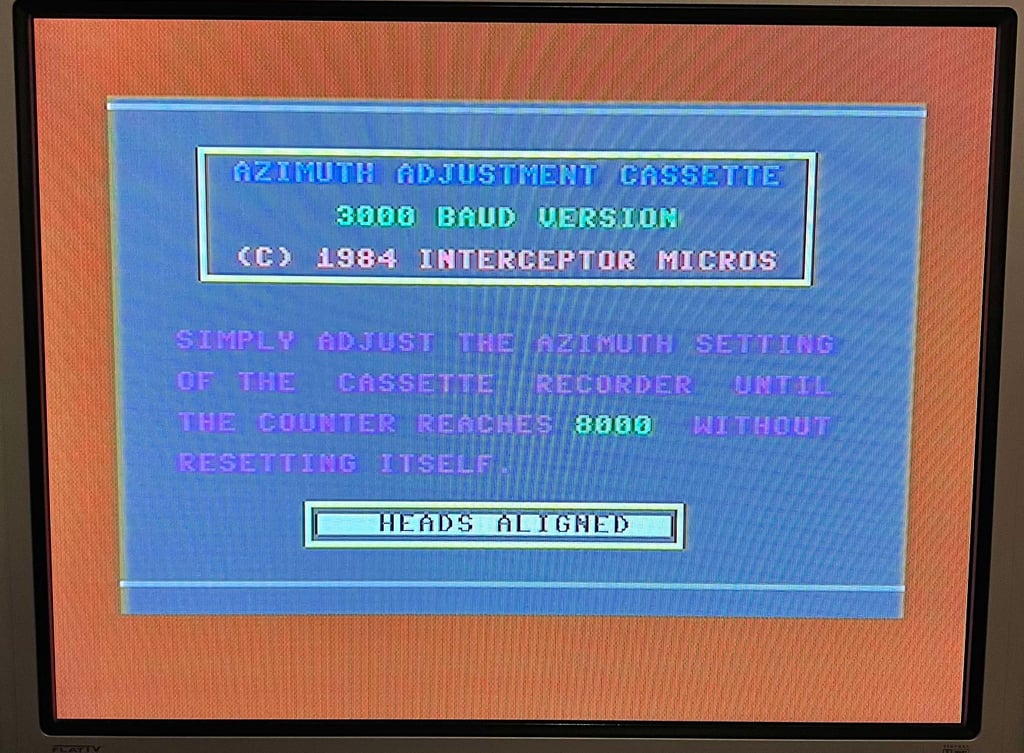
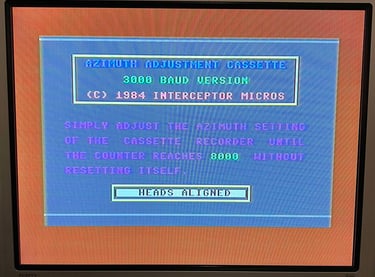
An additional bonus test
Recently I got this "Azimuth Head Alignment" tape from Interceptor Software. This is the first time I try this tape. It does looks to be in quite ok condition, but I am not really sure how well preserved it actually is. Nevertheless, the tape contains a program which loads first, and then a 3000 (?) baud signal is sent to the machine. If a counter reaches 8000 the datasette is diagnosed to be "Aligned".
This is the first time I try this software on a datasette. It does seem to me that the first part of the tape is quite worn out (?) as the counter resets. But after a while the counter stabilise and reaches the expected 8000. Does this testing bring any real value? I don´t really know. But I think I will try to use it on a few more datasettes moving forward. I don´t declare it as a "best-practice" tool of mine just yet...
Tape speed
Lately I have begun to check the speed of the tape playback. I am still a newbie in this area, but I think there is value in checking the playback speed.
The idea is smart, but simple:
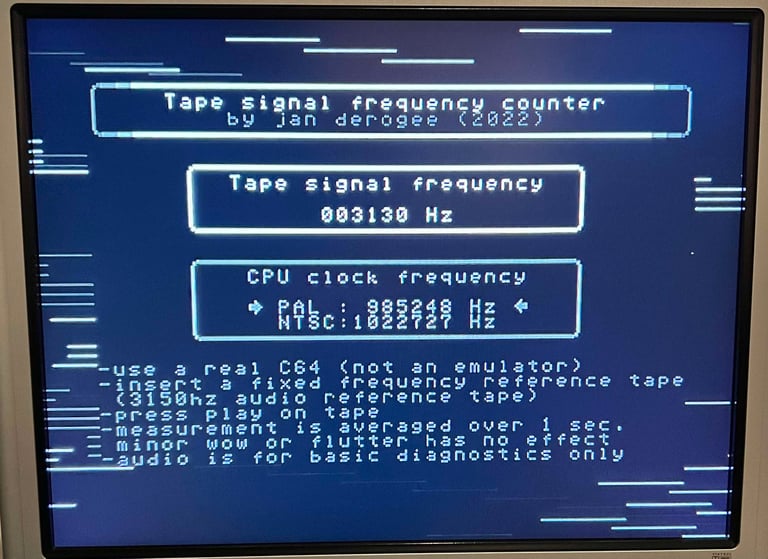
A professional Speed Calibration Audio cassette which contains a 440 Hz and 3150 Hz sinewave recording is loaded in the datasette. During playback of this tape a software (developed by J. Deorgee) reads the registered frequency on a Commodore 64. The idea is to adjust the speed until the recorded frequency, 3150 Hz, is measured.
Note that this great idea is not mine. The idea is based on a magnificent article by Jan Derogee and his Tape Frequency Counter software.
My experience so far is that the datasette (or datenrekorder) works best when the playback speed is in the range between 3150 - 3250 Hz. You could argue that the speed should be as close to 3150 Hz as possible, since this is the expected speed/frequency reading, but for reasons I have not understood yet I see that the tape deck works better with a slightly higher speed. I will continue to do these readings when refurbishing datasettes/datenrekorder to see if I can learn something!
As can be seen from the picture below the speed is bout 3130 Hz/437 Hz, so I don´t see any need to adjust the speed at the moment.


Testing
Playback
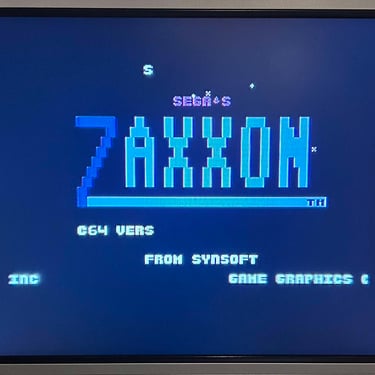
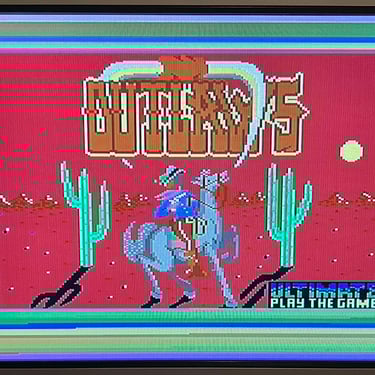
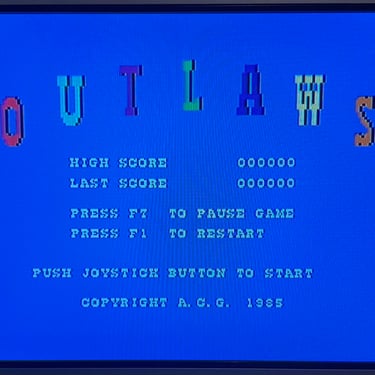
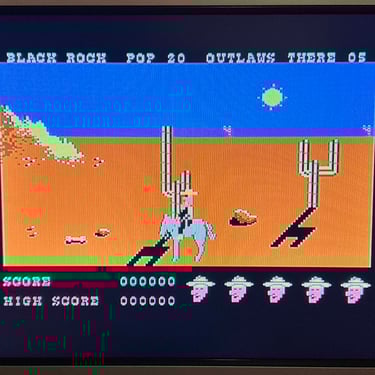
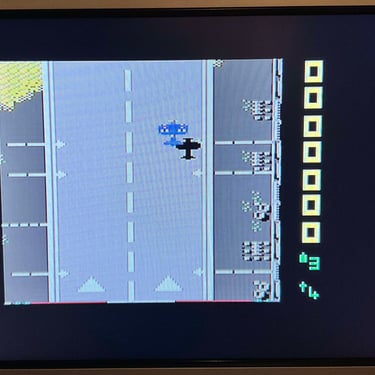
To make sure now works as it should I select five original C64 games to be used for testing. Even if these games are old and worn the load without any problems at all. Below is a picture gallery from the testing.


Recording
The saving functionality is also checked and verified. A small BASIC program is made and the SAVE command is used (and then the program is re-loaded). The LED is also on while recording is in progress.
The mystery tape
In the opening chapter I announced that there was a "mystery tape" inside the datasette labeled "Batman the movie". But is there something on it? Well, sort of. Unfortunately, the tape does not work properly. Nevertheless, it does show a title "DALESPILLET", but it will not load. I have a hunch on what this could be. The datasette was picked up at Sandnes, and at Sandnes there is a place called "Dale". Coincidence? I don´t think so. I guess this is a small BASIC program made by a previous owner.
I can not get it to work, but I will keep the tape. Perhaps one day I find a way to restore the program...
Final result


"A picture worth a thousand words"
Below is a collection of the final result from the refurbishment of this datasette. Hope you like it! Click to enlarge!
Banner picture credits: Evan-Amos